![[QT5] 常用控件: QWidget是什么? 了解 控件常用公共属性, QT的qrc资源管理机制...](https://dxyt-july-image.oss-cn-beijing.aliyuncs.com/202412241544080.webp)
QT中已经内置了许多的控件: 点击按钮、单选按钮、复选按钮、文本框、下拉框、状态栏…
一个完善的QT桌面程序, 是由许多的控件组成的
所以, 控件是非常重要的内容, 常用的控件需要逐一了解
了解QT内置控件
在前面的文章中, 简单的使用过两个控件QPushButton和QLabel, 对应点击按钮和文本标签
除此之外, QT内置了种类非常丰富的控件(但是颜值并不高), 打开QT Creator->Designer(双击QT项目的.ui文件)就能看到QT内置的控件:
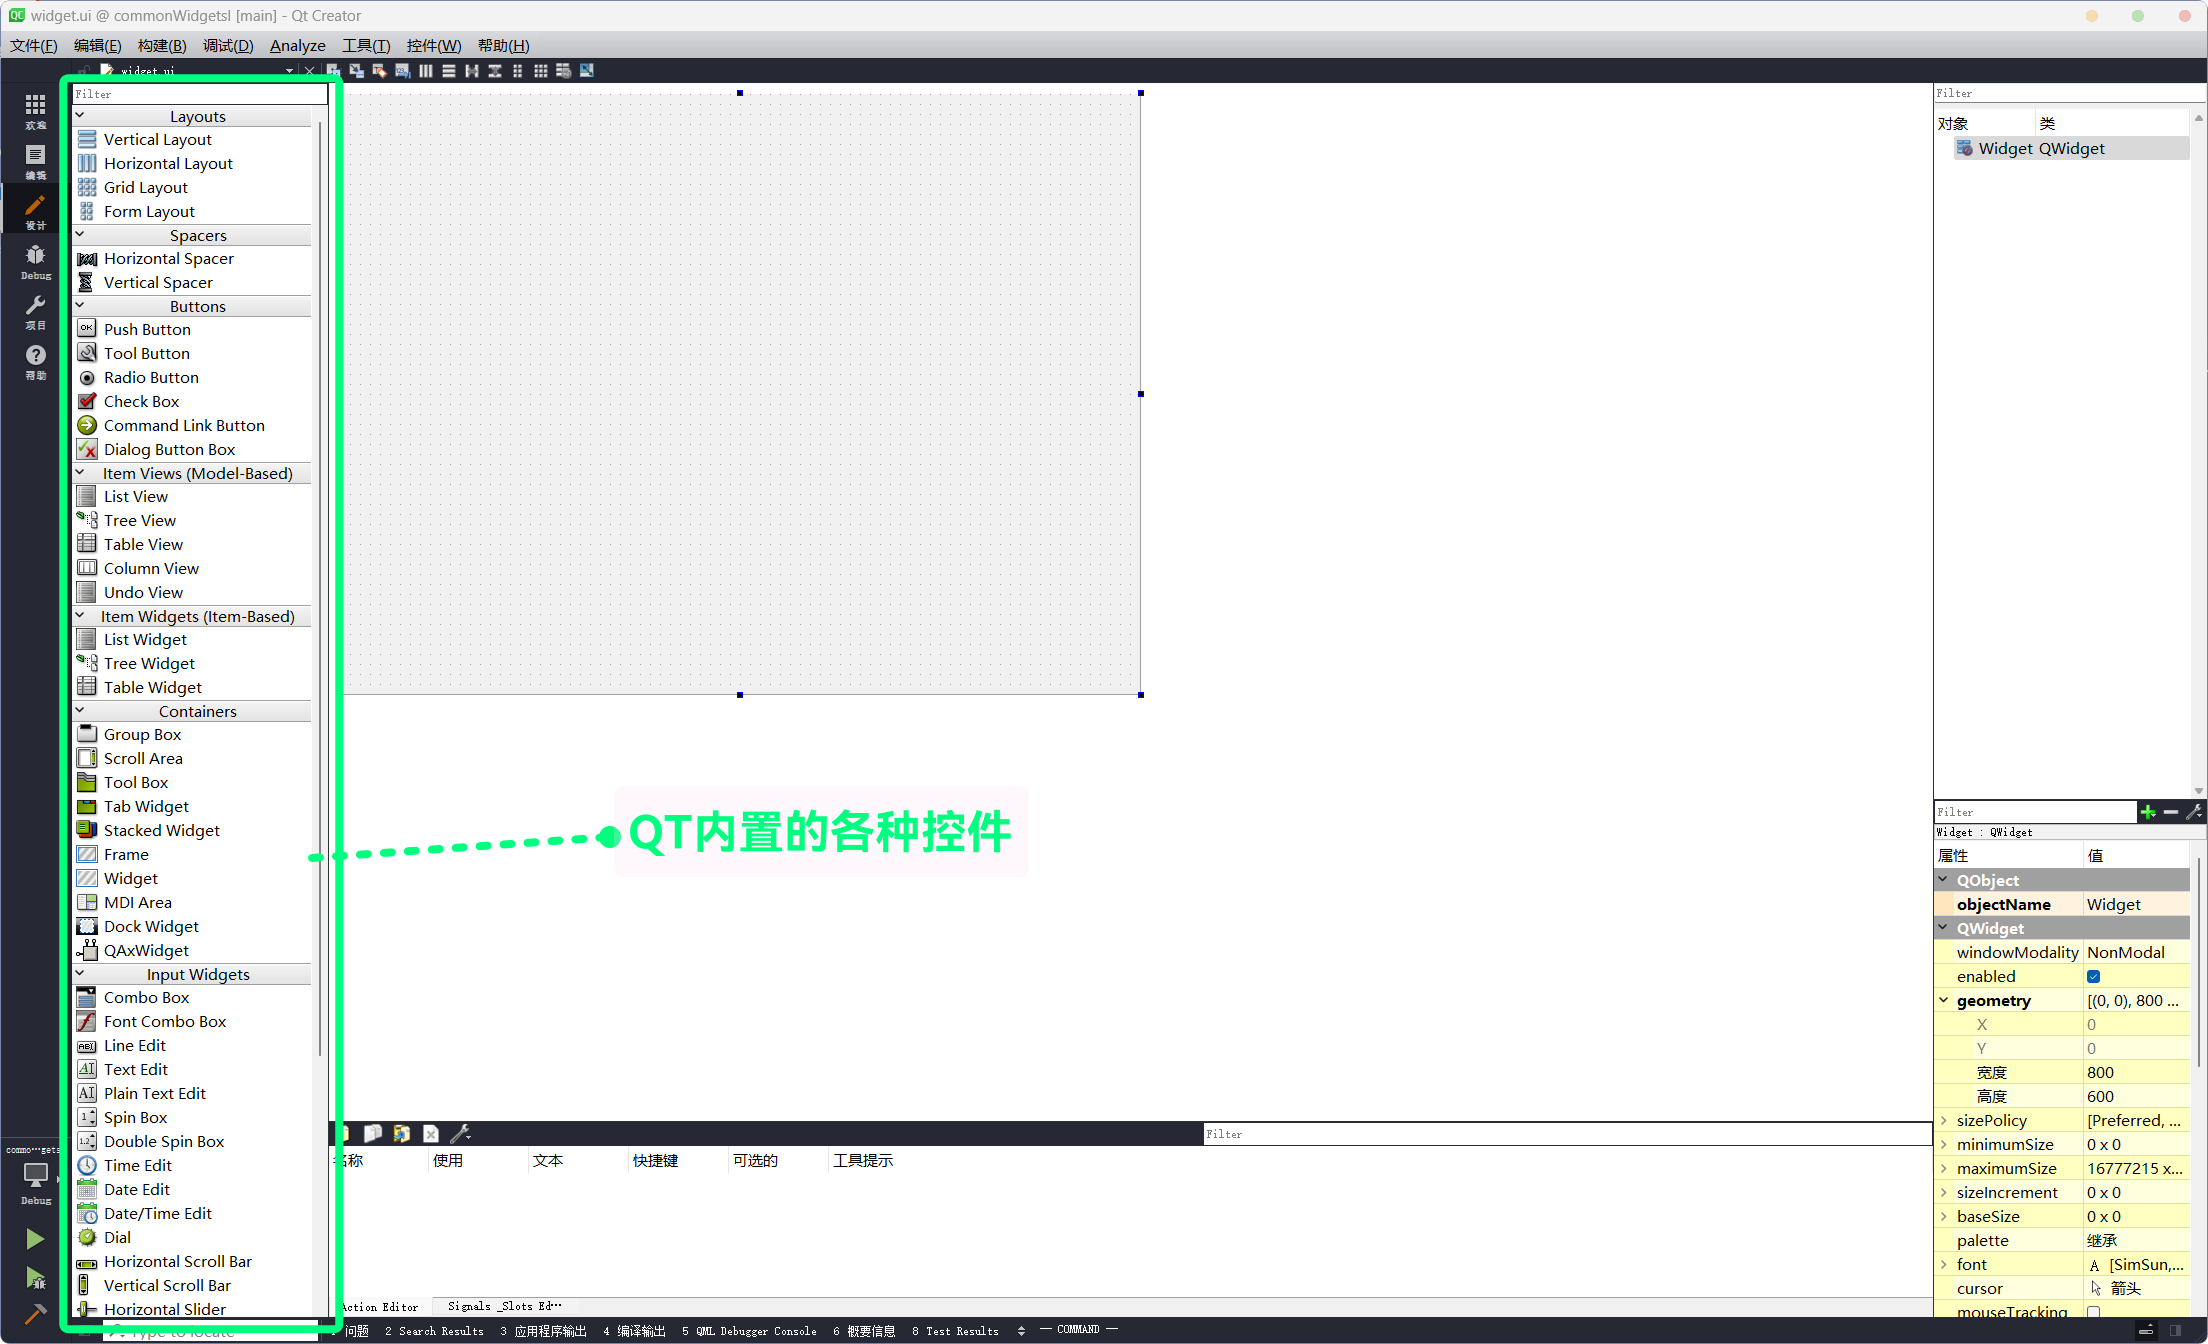
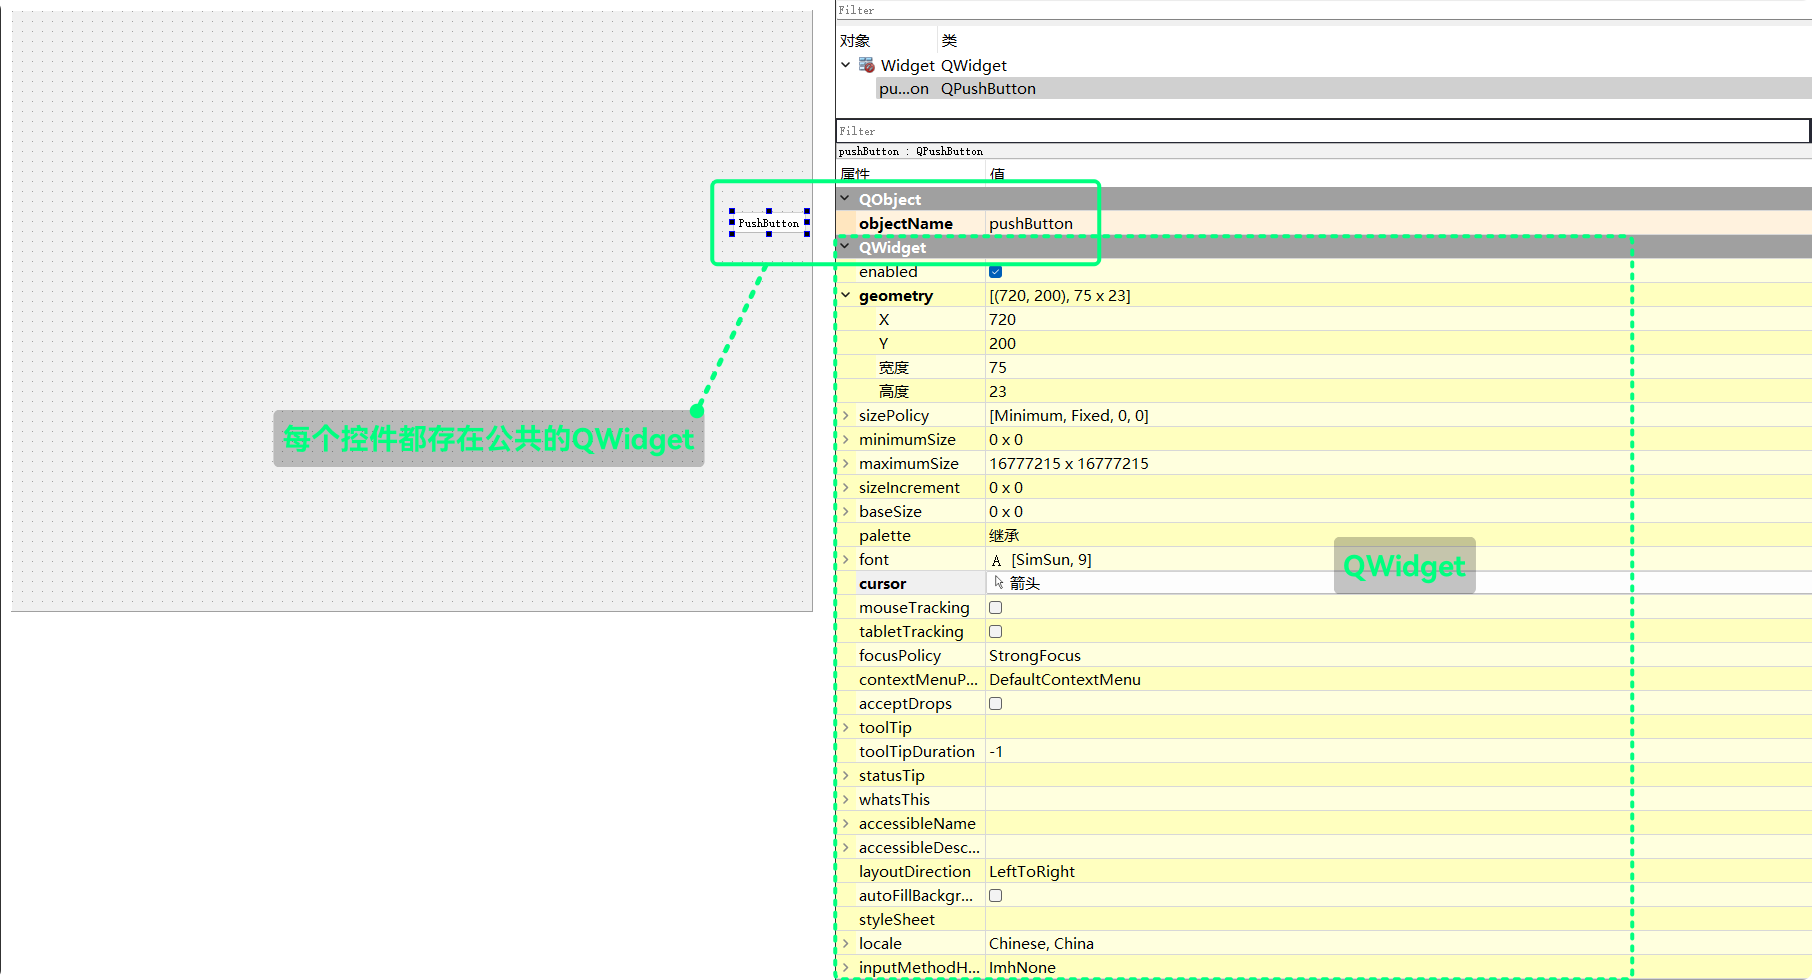
在了解各种控件类之前, 先了解一下QWidget类
QWidget是QT中控件的通用属性类, 在QT Designer中查看:
QWidget **
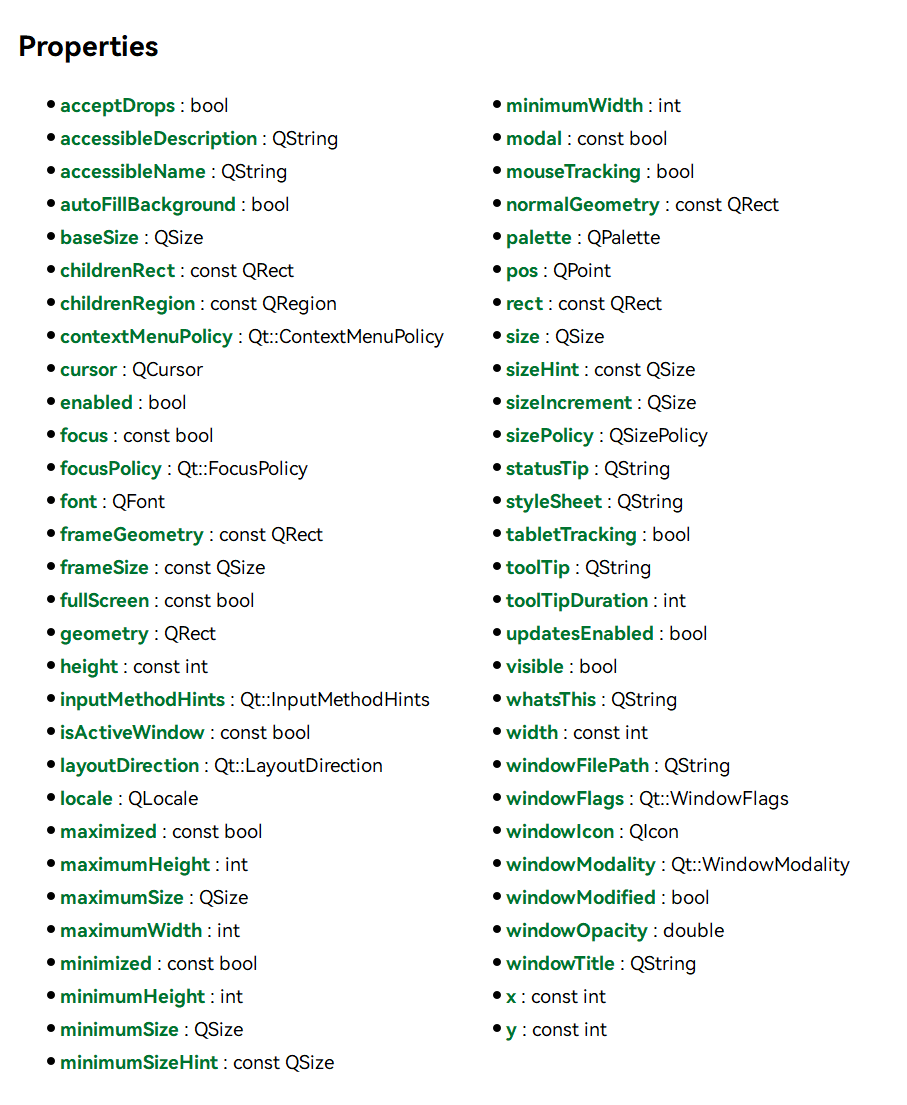
QWidget拥有很多属性, 可以直接在QT的文档中查看:
也可以在QT Designer中查看:
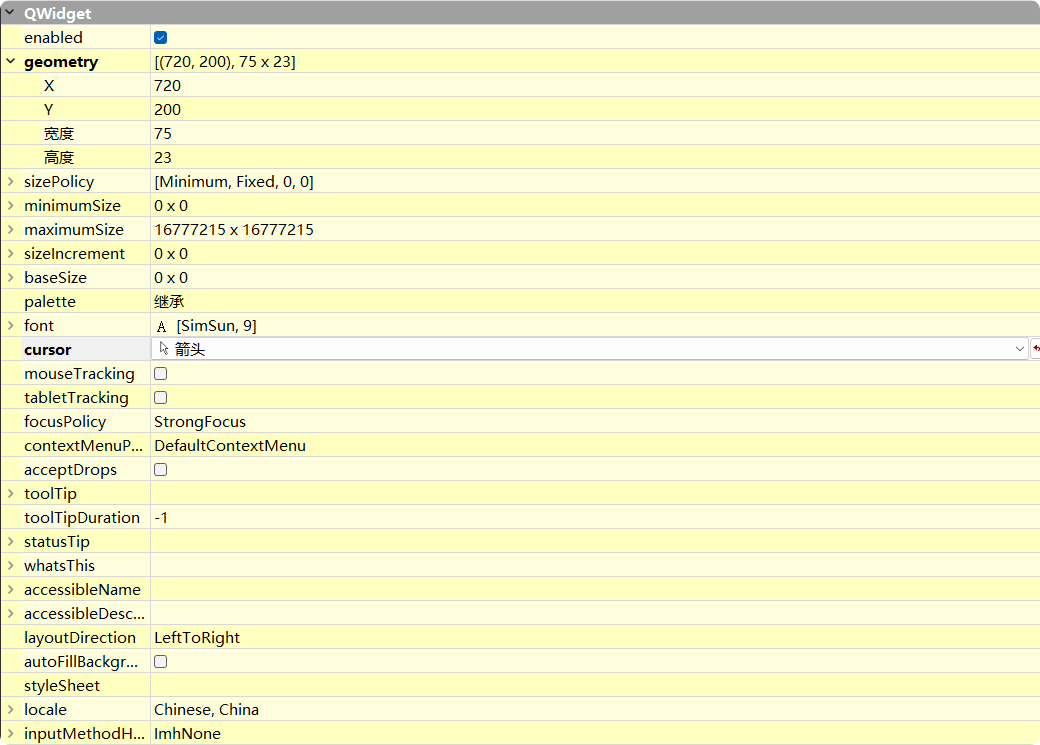
对于常用的公共属性, 可以一一进行介绍一下
enabled
此属性, 用于设置控件的可用状态
QT提供了相关的接口:
| 接口 | 功能 |
|---|---|
bool isEnabled() const; | 获取控件当前enabled值 |
void setEnabled(bool); | 设置控件可用状态 |
添加两个QPushButton, 并将enabled属性设置为false和true
widget.cc:
#include "widget.h"
#include "ui_widget.h"

#include <QPushButton>

Widget::Widget(QWidget* parent)
    : QWidget(parent)
    , ui(new Ui::Widget) {
    ui->setupUi(this);

    QPushButton* btn1 = new QPushButton(this);
    btn1->setText("按钮1");
    btn1->move(200, 200);
    btn1->setEnabled(false);

    QPushButton* btn2 = new QPushButton(this);
    btn2->setText("按钮2");
    btn2->move(300, 300);
    btn2->setEnabled(true);
}

Widget::~Widget() {
    delete ui;
}
执行结果为:
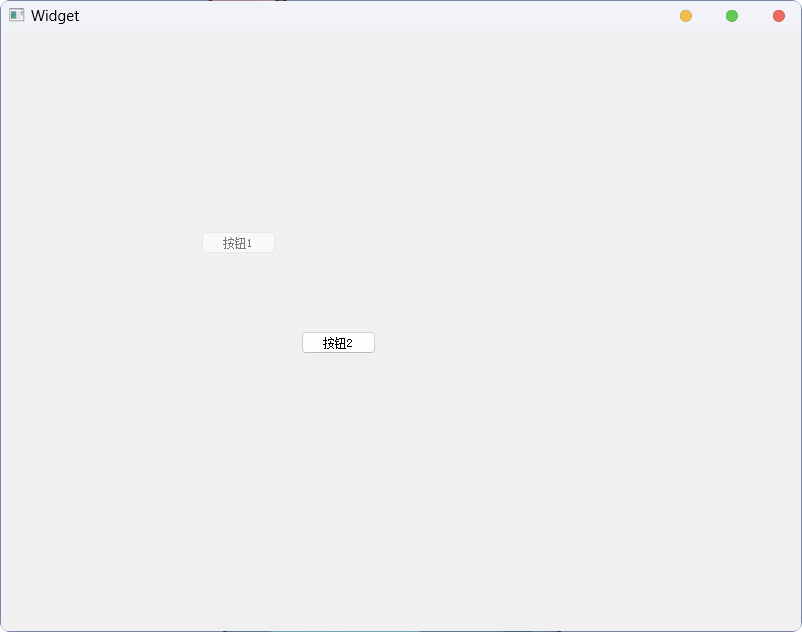
可以看到, 按钮1为灰色, 处于不可选中状态; 按钮2, 则处于正常状态
控件的enabled属性是可以随时改变的:
widget.h:
#ifndef WIDGET_H
#define WIDGET_H

#include <QWidget>
#include <QPushButton>

QT_BEGIN_NAMESPACE
namespace Ui {
    class Widget;
}
QT_END_NAMESPACE

class Widget : public QWidget {
    Q_OBJECT

public:
    Widget(QWidget* parent = nullptr);
    ~Widget();

private slots:
    void btn1ClickedHandler();
    void btn2ClickedHandler();

private:
    Ui::Widget* ui;
    QPushButton* btn1;
    QPushButton* btn2;
};
#endif // WIDGET_Hwidget.cc:
#include "widget.h"
#include "ui_widget.h"

#include <QPushButton>
#include <QDebug>

Widget::Widget(QWidget* parent)
    : QWidget(parent)
    , ui(new Ui::Widget) {
    ui->setupUi(this);

    btn1 = new QPushButton(this);
    btn1->setText("按钮1");
    btn1->move(200, 200);
    btn1->setEnabled(false);

    btn2 = new QPushButton(this);
    btn2->setText("按钮2");
    btn2->move(300, 300);
    btn2->setEnabled(true);

    connect(btn1, &QPushButton::clicked, this, &Widget::btn1ClickedHandler);
    connect(btn2, &QPushButton::clicked, this, &Widget::btn2ClickedHandler);
}

Widget::~Widget() {
    delete ui;
}

void Widget::btn1ClickedHandler() {
    qDebug() << "按钮1被点击, 槽函数执行";
}

void Widget::btn2ClickedHandler() {
    bool btn1Enabled = btn1->isEnabled();
    if (btn1Enabled)
        btn1->setEnabled(false);
    else
        btn1->setEnabled(true);
}
这段代码的执行结果为:
geometry
此属性, 用于设置当前控件的位置和尺寸, 即 (x, y)和(width, height)
QT为geometry提供了几个接口, 用于获取当前控件的位置和尺寸或设置当前控件的位置和尺寸
| 接口 | 功能 |
|---|---|
inline const QRect &QWidget::geometry() const; | 获取控件当前geometry属性 |
inline void setGeometry(int x, int y, int w, int h); | 通过4个int设置控件的geometry属性 |
void setGeometry(const QRect &); | 通过QRect设置控件的geometry属性 |
实际的使用:
widget.cc:
#include "widget.h"
#include "ui_widget.h"

#include <QPushButton>
#include <QDebug>
#include <QRect>

Widget::Widget(QWidget* parent)
    : QWidget(parent)
    , ui(new Ui::Widget) {
    ui->setupUi(this);

    btn1 = new QPushButton(this);
    btn1->setText("按钮1");
    btn1->move(200, 200);
    btn1->setEnabled(false);

    btn2 = new QPushButton(this);
    btn2->setText("按钮2");
    btn2->move(300, 300);
    btn2->setEnabled(true);

    QRect btn1Geom = btn1->geometry();
    QRect btn2Geom = btn2->geometry();
    qDebug("按钮1 坐标: (%d, %d), 尺寸: (%d, %d)", btn1Geom.x(), btn1Geom.y(), btn1Geom.width(), btn1Geom.height());
    qDebug("按钮2 坐标: (%d, %d), 尺寸: (%d, %d)", btn2Geom.x(), btn2Geom.y(), btn2Geom.width(), btn2Geom.height());

    connect(btn1, &QPushButton::clicked, this, &Widget::btn1ClickedHandler);
    connect(btn2, &QPushButton::clicked, this, &Widget::btn2ClickedHandler);
}

Widget::~Widget() {
    delete ui;
}

void Widget::btn1ClickedHandler() {
    qDebug() << "按钮1被点击, 槽函数执行";
}

void Widget::btn2ClickedHandler() {
    QRect btn1Geom = btn1->geometry();
    qDebug("按钮1 坐标: (%d, %d), 尺寸: (%d, %d)", btn1Geom.x(), btn1Geom.y(), btn1Geom.width(), btn1Geom.height());

    bool btn1Enabled = btn1->isEnabled();
    if (btn1Enabled) {
        // 可用
        btn1->setEnabled(false);
        btn1Geom.setX(200);
        btn1Geom.setY(200);
        btn1Geom.setWidth(100);
        btn1Geom.setHeight(30);

        btn1->setGeometry(btn1Geom);
        qDebug("重新设置按钮1 坐标: (%d, %d), 尺寸: (%d, %d)", btn1Geom.x(), btn1Geom.y(), btn1Geom.width(), btn1Geom.height());
    }
    else {
        // 不可用
        btn1->setEnabled(true);
        btn1Geom.setX(500);
        btn1Geom.setY(500);
        btn1Geom.setWidth(200);
        btn1Geom.setHeight(30);

        btn1->setGeometry(btn1Geom);
        qDebug("重新设置按钮1 坐标: (%d, %d), 尺寸: (%d, %d)", btn1Geom.x(), btn1Geom.y(), btn1Geom.width(), btn1Geom.height());
    }
}
这段代码的执行结果为:
geometry()接口, 可以获取控件当前的坐标和尺寸, 返回值是一个QRect对象
QRect对象包含x y width height, 四个属性
QRect对象, 可以通过qDebug() << QRect直接打印坐标和尺寸信息
setGeometry()接口, 则可以设置控件的坐标和尺寸, 可以通过传入QRect对象, 也可以通过传入四个int
跳跃的按钮(小玩具程序)
先通过图形化创建QPushButton控件, 并创建clicked信号的槽
然后实现槽函数就可以了:
#include "widget.h"
#include "ui_widget.h"

#include <ctime>

Widget::Widget(QWidget* parent)
    : QWidget(parent)
    , ui(new Ui::Widget) {
    ui->setupUi(this);

    srand(time(nullptr));
}

Widget::~Widget() {
    delete ui;
}

void Widget::on_pushButton_clicked() {
    // 获取窗口的尺寸, 防止按钮跳跃出窗口
    int winWidth = this->geometry().width();
    int winHeight = this->geometry().height();

    int x = rand() % winWidth;
    int y = rand() % winHeight;
	// 防止按钮越界
    x > (winWidth - ui->pushButton->geometry().width()) ? (x = winWidth - ui->pushButton->geometry().width()) : x;
    y > (winHeight - ui->pushButton->geometry().height()) ? (y = winHeight - ui->pushButton->geometry().height()) : y;

    ui->pushButton->setGeometry(x, y, ui->pushButton->geometry().width(), ui->pushButton->geometry().height());
}
这样一个简单的小游戏就实现了:
不过, 上面是实现了对clicked信号的槽, 还有一个信号是pressed
clicked是被点击, 而pressed是被按压
clicked由两个动作完整组成: 按压 和 抬起, 而pressed则仅表示被按压:
#include "widget.h"
#include "ui_widget.h"

#include <ctime>

Widget::Widget(QWidget* parent)
    : QWidget(parent)
    , ui(new Ui::Widget) {
    ui->setupUi(this);

    srand(time(nullptr));
}

Widget::~Widget() {
    delete ui;
}

void Widget::on_pushButton_pressed() {
    // 获取窗口的尺寸, 防止按钮跳跃出窗口
    int winWidth = this->geometry().width();
    int winHeight = this->geometry().height();

    int x = rand() % winWidth;
    int y = rand() % winHeight;

    x > (winWidth - ui->pushButton->geometry().width()) ? (x = winWidth - ui->pushButton->geometry().width()) : x;
    y > (winHeight - ui->pushButton->geometry().height()) ? (y = winHeight - ui->pushButton->geometry().height()) : y;

    ui->pushButton->setGeometry(x, y, ui->pushButton->geometry().width(), ui->pushButton->geometry().height());
}对pressed信号实现槽, 可以实现鼠标左键不松的状态下, 光标移动到按钮上, 按钮就跳跃移动:
WindowFrame的影响 **
WindowFrame一般是由系统的桌面环境提供的, 它通常是窗口默认的标题栏、边框等元素
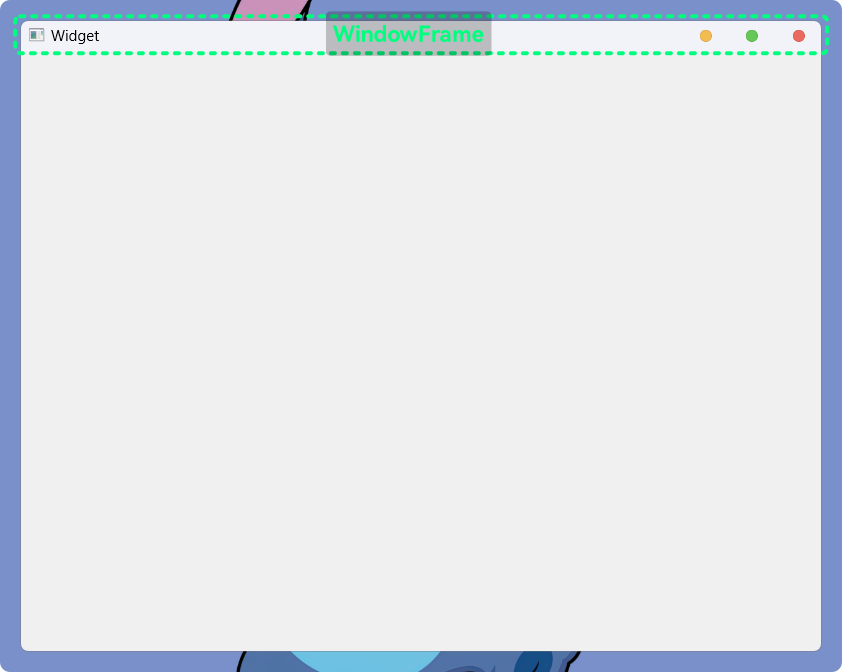
边框也算WindowFrame的一部分
之前的代码中, QPushButton控件move()、geometry()、setGeometry()接口, 设置或获取的都是控件相对于Widget本体的位置信息(左上角为(0, 0)):
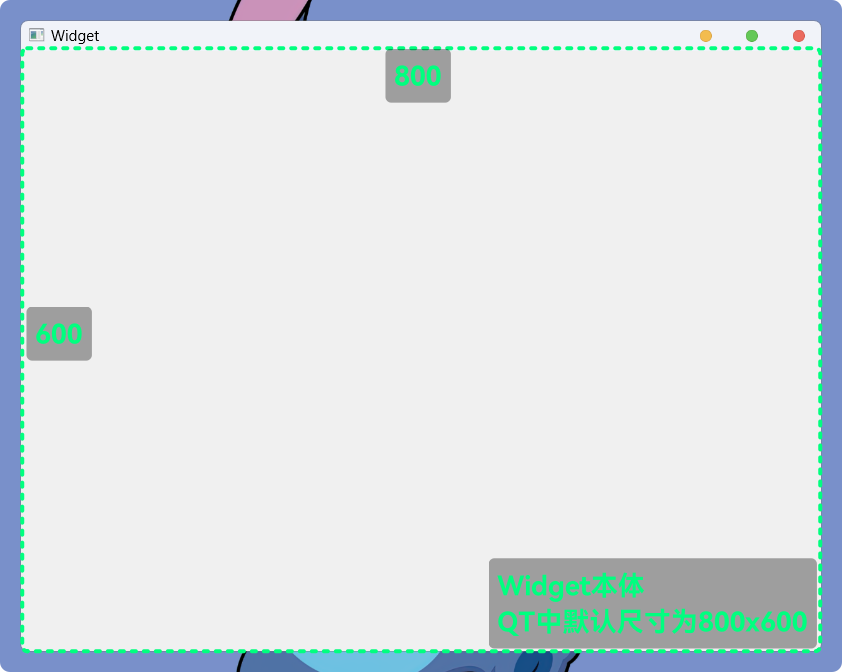
窗口的WindowFrame元素是没有被计算在内的
不过QT也提供了针对WindowFrame的接口
对于一个窗口, QT提供了一些接口, 能够获取当前窗口的位置、尺寸信息:
| 接口 | 功能 |
|---|---|
int x() const; | 获取窗口相对于桌面的横坐标, 包含WindowFrame计算 |
int y() const; | 获取窗口相对于桌面的纵坐标, 包含WindowFrame计算 |
QPoint pos() const; | 获取窗口相对于桌面的位置, 包含WindowFrame计算 返回的 QPoint包含(x, y)相关信息 |
QSize frameSize() const; | 获取窗口的尺寸, 包含WindowFrame计算 返回的 QSize包含(width, height)相关信息 |
QRect frameGeometry() const; | 获取窗口相对于桌面的位置及尺寸, 包含WindowFrame计算 |
int width() const; | 获取窗口内Widget本体的宽, 不包含WindowFrame计算 |
int height() const; | 获取窗口内Widget本体的高, 不包含WindowFrame计算 |
QSize size() const; | 获取窗口内Widget的尺寸, 不包含WindowFrame计算 |
QRect rect() const | 获取窗口内Widget本体的位置及尺寸, 不包含WindowFrame计算 |
const QRect geometry() const; | 获取窗口内Widget本体的位置及尺寸, 不包含WindowFrame计算 |
void setGeometry(); | 设置Widget本体或控件的位置及尺寸, 不包含WindowFrame计算 |
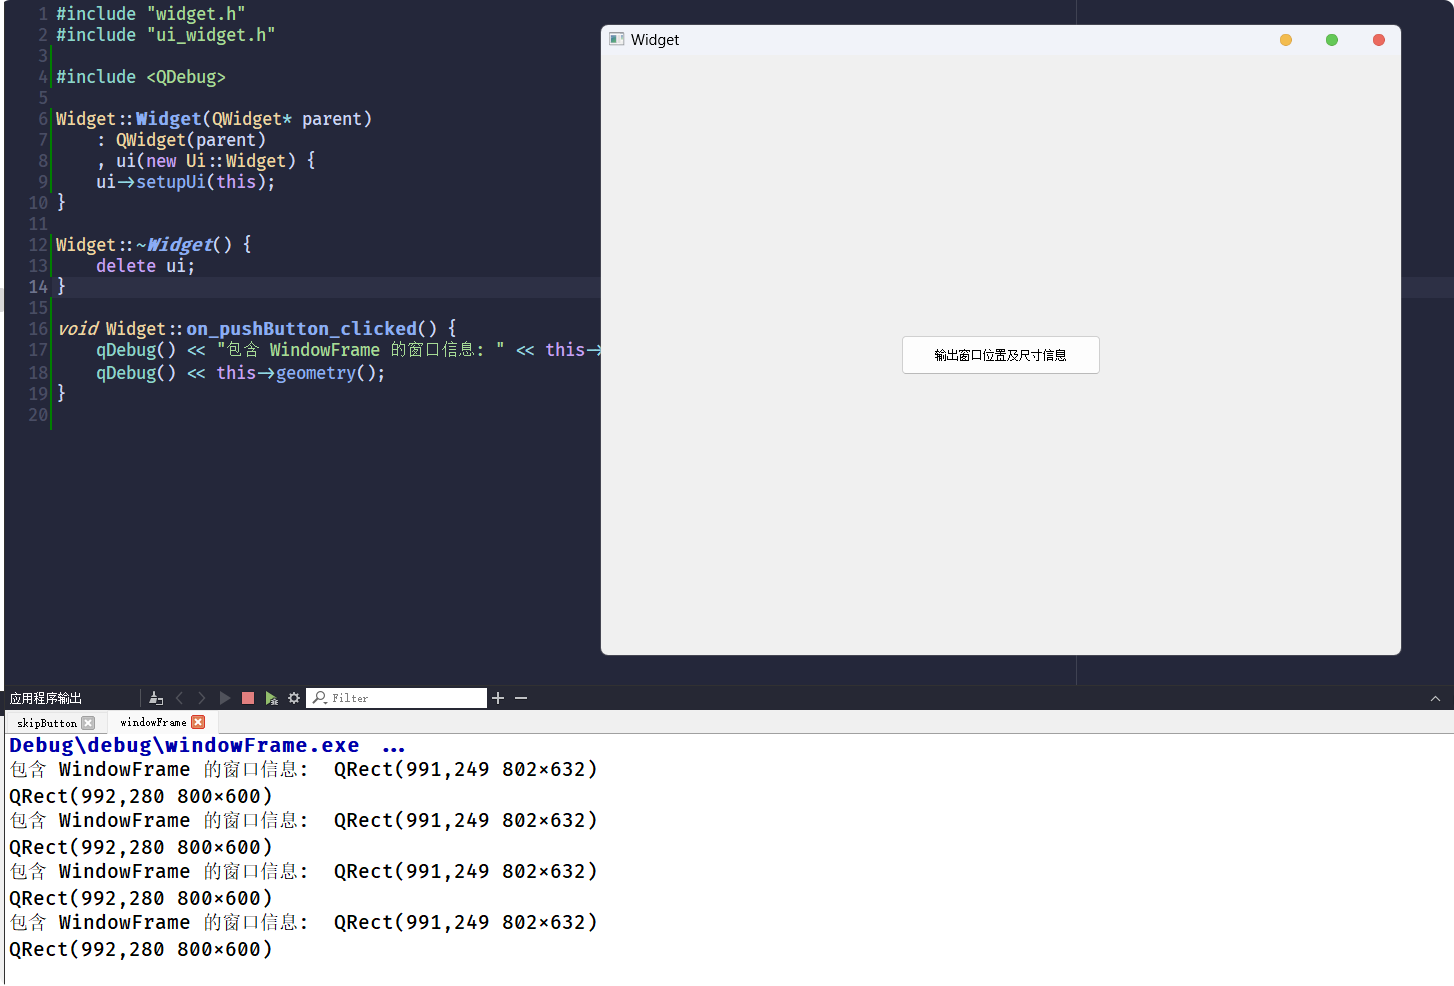
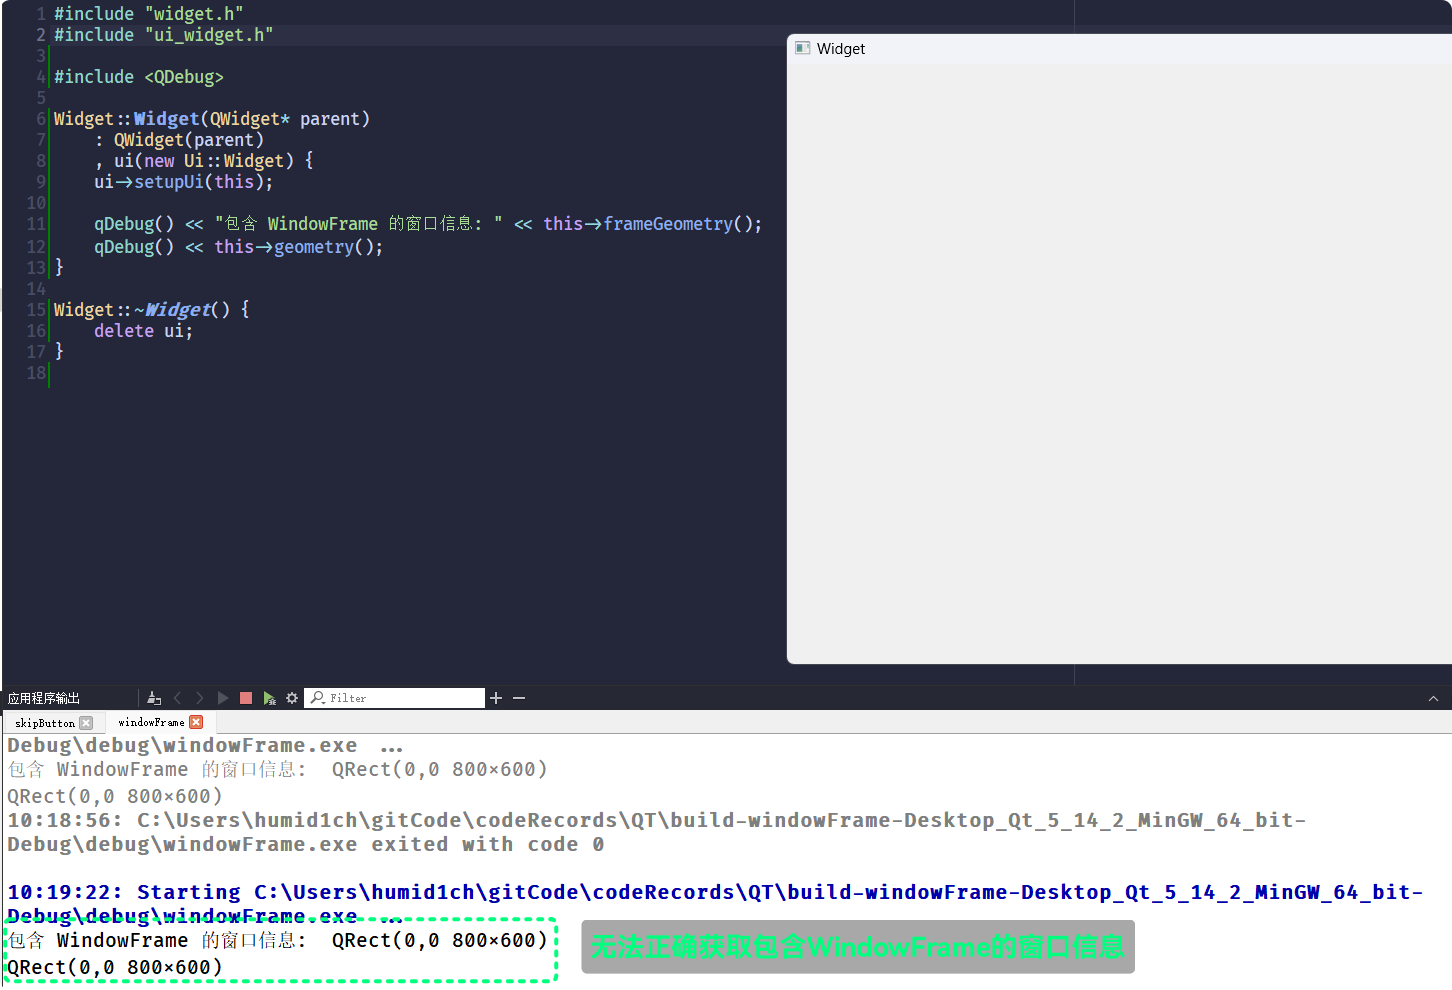
使用这段代码可以查看计算WindowFrame的窗口信息:
#include "widget.h"
#include "ui_widget.h"

#include <QDebug>

Widget::Widget(QWidget* parent)
    : QWidget(parent)
    , ui(new Ui::Widget) {
    ui->setupUi(this);
}

Widget::~Widget() {
    delete ui;
}

void Widget::on_pushButton_clicked() {
    qDebug() << "包含 WindowFrame 的窗口信息: " << this->frameGeometry();
    qDebug() << this->geometry();
}
要想获取包含了
WindowFrame的窗口属性不能在窗口构造阶段进行获取, 因为
WindowFrame是由系统的桌面环境提供的所以, 在窗口构造阶段,
WindowFrame还没有被添加, 无法正确获取:
windowTitle
上面QT Designer中, 对于QPushButton属性的展示 并没有关于窗口的属性, 因为这部分属性对QPushButton没有什么用, 所以 QT Designer没有进行展示
点击Widget窗口就能够看到window...的相关属性:
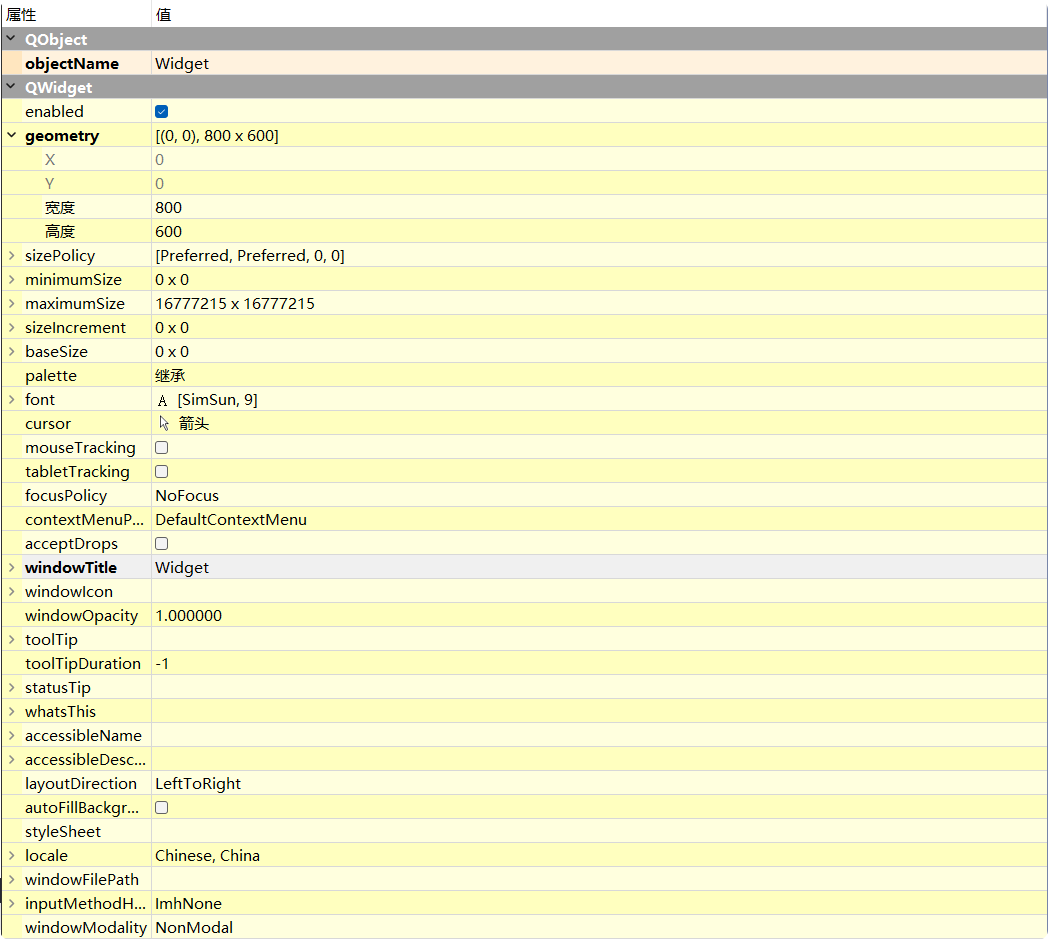
此属性, 用于设置窗口标题, 且只有对独立的窗口设置才有效
QT提供了两个相关接口:
| 接口 | 功能 |
|---|---|
QString windowTitle() const; | 获取窗口标题 |
void setWindowTitle(const QString &); | 设置窗口标题 |
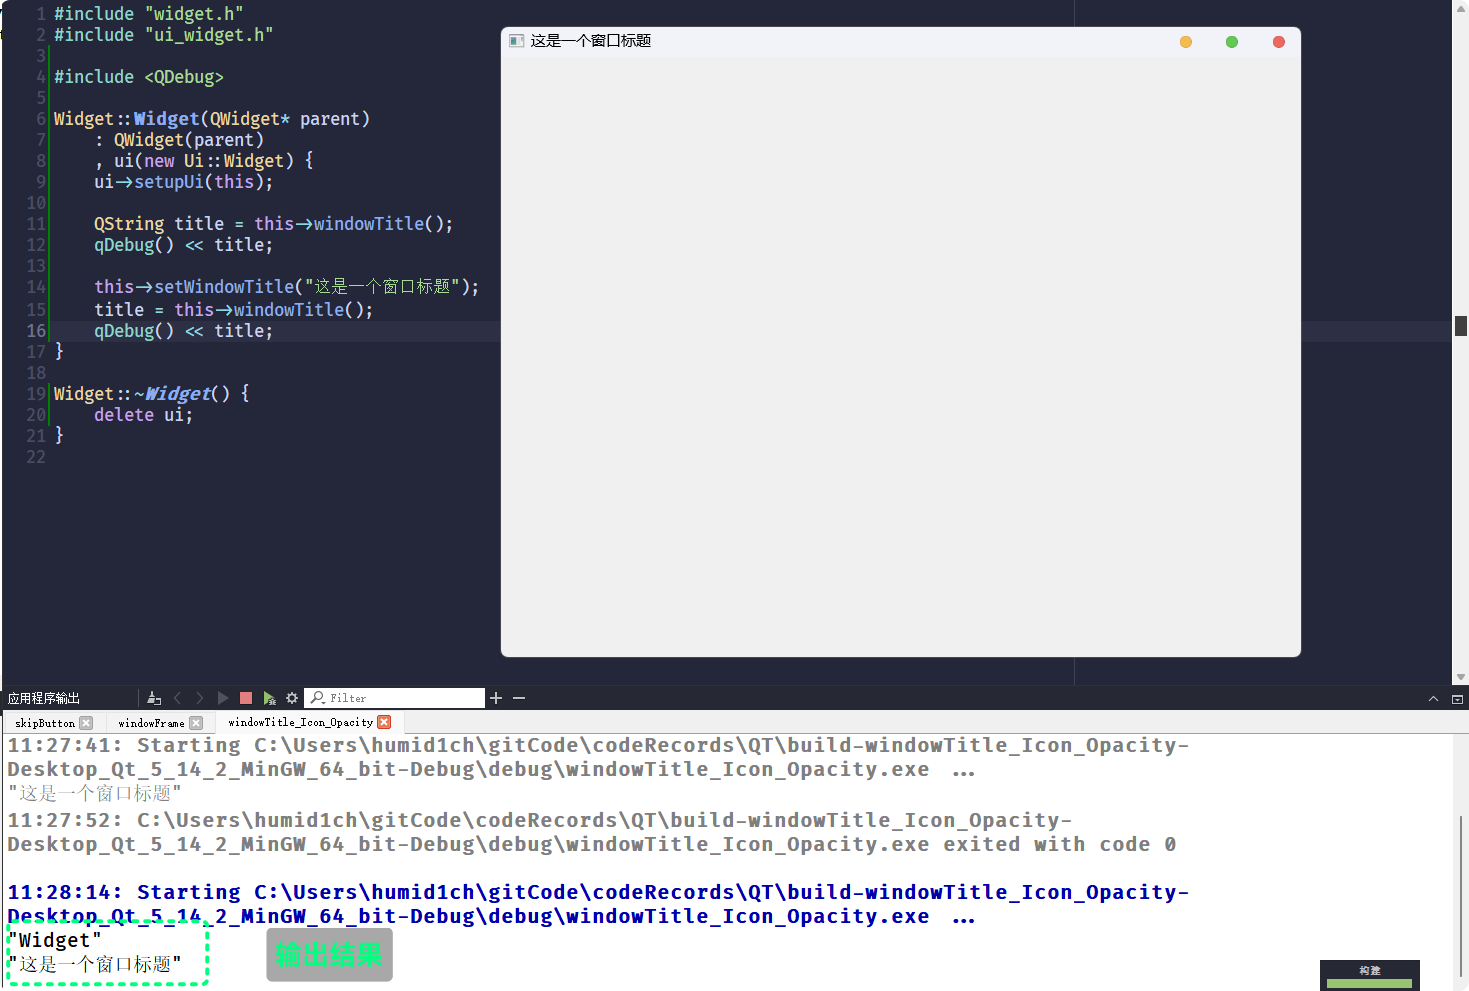
可以直接在Widget的构造函数里使用, 获取结果:
Widget::Widget(QWidget* parent)
: QWidget(parent)
, ui(new Ui::Widget) {
ui->setupUi(this);
QString title = this->windowTitle();
qDebug() << title;
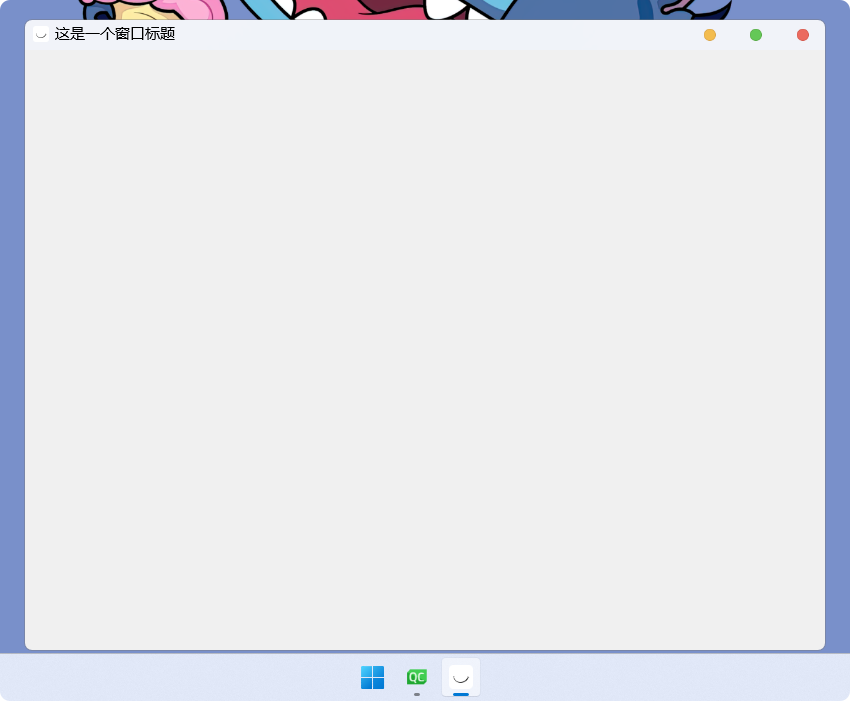
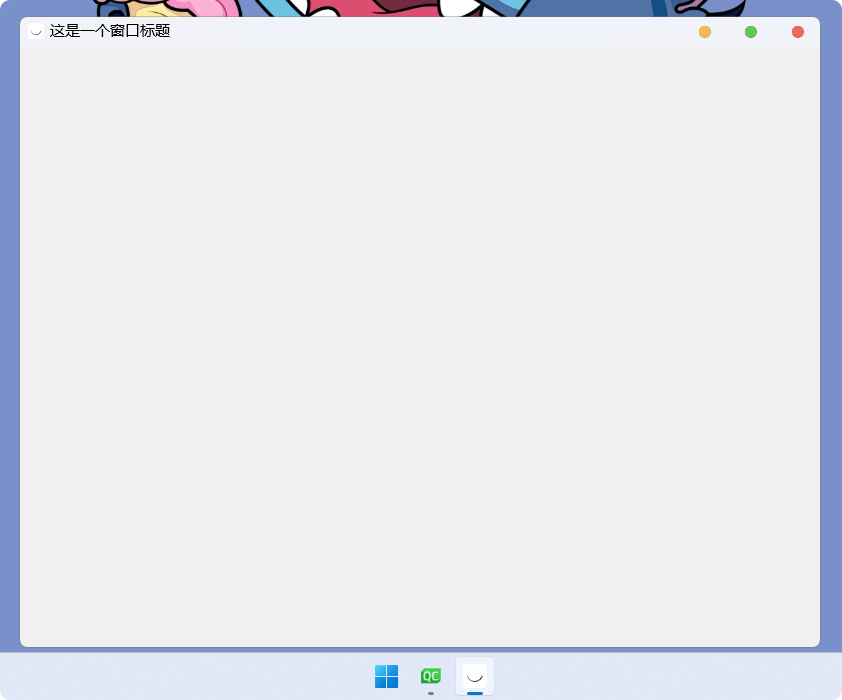
this->setWindowTitle("这是一个窗口标题");
title = this->windowTitle();
qDebug() << title;
}
windowTitle这个属性只对独立的窗口有效, 不过 其他控件设置并不会报错:
#include "widget.h"
#include "ui_widget.h"

#include <QDebug>

Widget::Widget(QWidget* parent)
    : QWidget(parent)
    , ui(new Ui::Widget) {
    ui->setupUi(this);

    QString title = this->windowTitle();
    qDebug() << title;

    this->setWindowTitle("这是一个窗口标题");
    title = this->windowTitle();
    qDebug() << title;

    btn = new QPushButton(this); 	// btn 添加为成员变量
    btn->setText("这是一个按钮");
    connect(btn, &QPushButton::clicked, this, &Widget::btnClickedHandler);
}

Widget::~Widget() {
    delete ui;
}

void Widget::btnClickedHandler() {
    btn->setWindowTitle("给按钮设置标题??");
}
执行代码, 点击按钮
什么事都没有发生
从结果来看, 给非独立窗口设置windowTitle不会发生报错, 所以 当预期是设置窗口的标题没有报错, 却又没有实现时, 可以查看一下是不是设置错控件了
windowIcon
此属性, 用于设置窗口的图标, 且此属性同样对独立窗口有效
QT提供的接口:
| 接口 | 功能 |
|---|---|
QIcon windowIcon() const; | 获取窗口当前图标属性 |
void setWindowIcon(const QIcon &icon); | 设置窗口图标属性 |
设置windowIcon属性, 需要借助一个类QIcon
QIcon这个类虽然拥有很多成员, 但在这是windowIcon时, 用法非常简单
只需要通过图标文件路径实例化出QIcon对象就可以:
widget.cc:
#include "widget.h"
#include "ui_widget.h"

#include <QDebug>

Widget::Widget(QWidget* parent)
    : QWidget(parent)
    , ui(new Ui::Widget) {
    ui->setupUi(this);

    QString title = this->windowTitle();
    qDebug() << title;

    this->setWindowTitle("这是一个窗口标题");
    title = this->windowTitle();
    qDebug() << title;

    QIcon winIcon("c:/Users/humid1ch/smile.png");
    this->setWindowIcon(winIcon);
}

Widget::~Widget() {
    delete ui;
}
QIcon的图标路径, 除了绝对路径之外, 也可以使用相对路径
这里的相对路径, 是相对可执行程序的执行路径
我的项目路径在: C:\Users\humid1ch\gitCode\codeRecords\QT
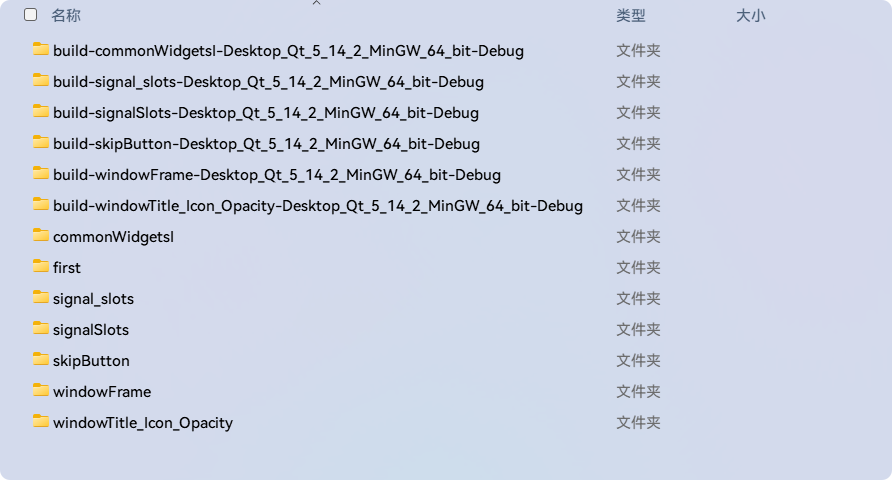
可执行程序的所在目录是build-xxxxx的debug/release目录下:
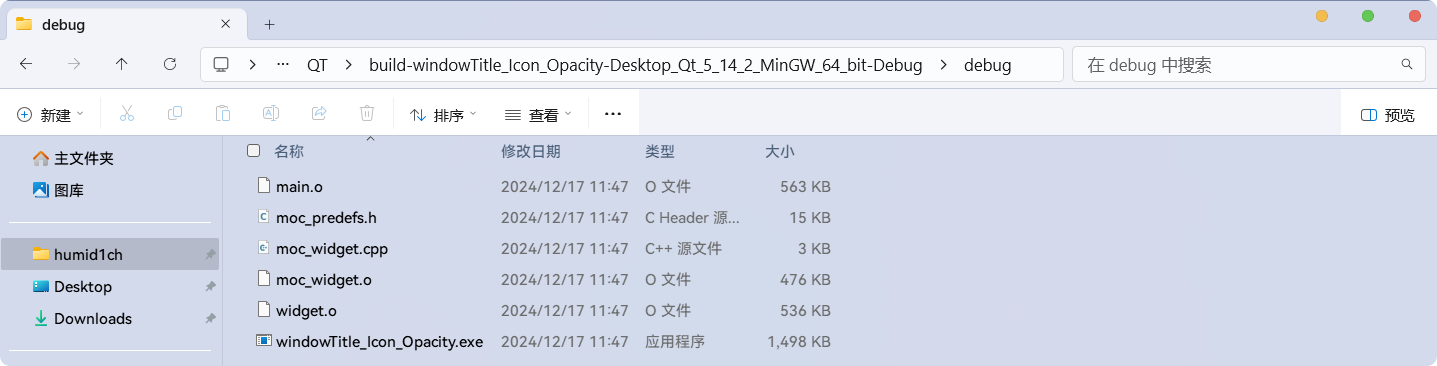
而, QT Creator运行可执行程序时所在目录, 会在build-xxxxx目录下
所以, 修改QIcon的图标路径为./smile.png, 并将图标放在build-xxxxx目录下
#include "widget.h"
#include "ui_widget.h"
#include <QDebug>
Widget::Widget(QWidget* parent)
: QWidget(parent)
, ui(new Ui::Widget) {
ui->setupUi(this);
QString title = this->windowTitle();
qDebug() << title;
this->setWindowTitle("这是一个窗口标题");
title = this->windowTitle();
qDebug() << title;
QIcon winIcon("./smile.png");
this->setWindowIcon(winIcon);
}
Widget::~Widget() {
delete ui;
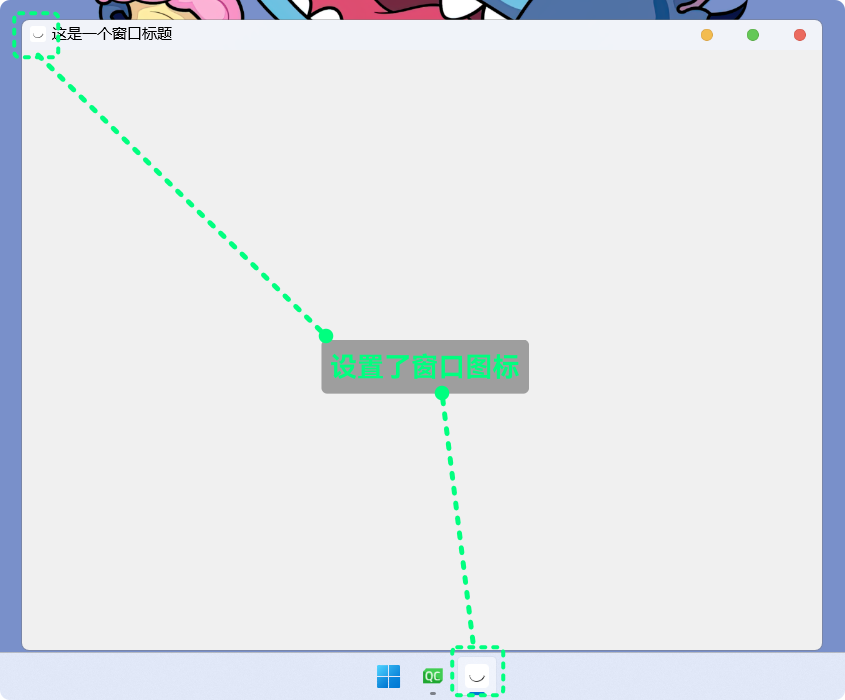
}编译运行, 同样可以实现窗口图标的设置:
但是, 无论是绝对路径或是相对路径, 实际上都不能保证程序能实际找到图片资源
所以, QT提供有另一个方式来管理程序的资源: qrc
qrc资源管理机制 **
什么是qrc?
QT中, .qrc是一种xml类型的文件, .qrc的内容通常是文件资源的路径
被.qrc文件描述的文件资源, 在QT Creator编译代码时, 会以二进制的形式加载到可执行程序中, 以实现程序直接对文件资源的使用, 不需要在磁盘中在保存一份
即, 被qrc机制管理的文件, 不需要在磁盘中保存一份, 程序也不需要以资源在磁盘中的相对或绝对路径访问资源, 而是可以直接通过特殊的路径, 访问已经被加载到可执行程序中的文件资源
QT Creator创建.qrc文件很简单:
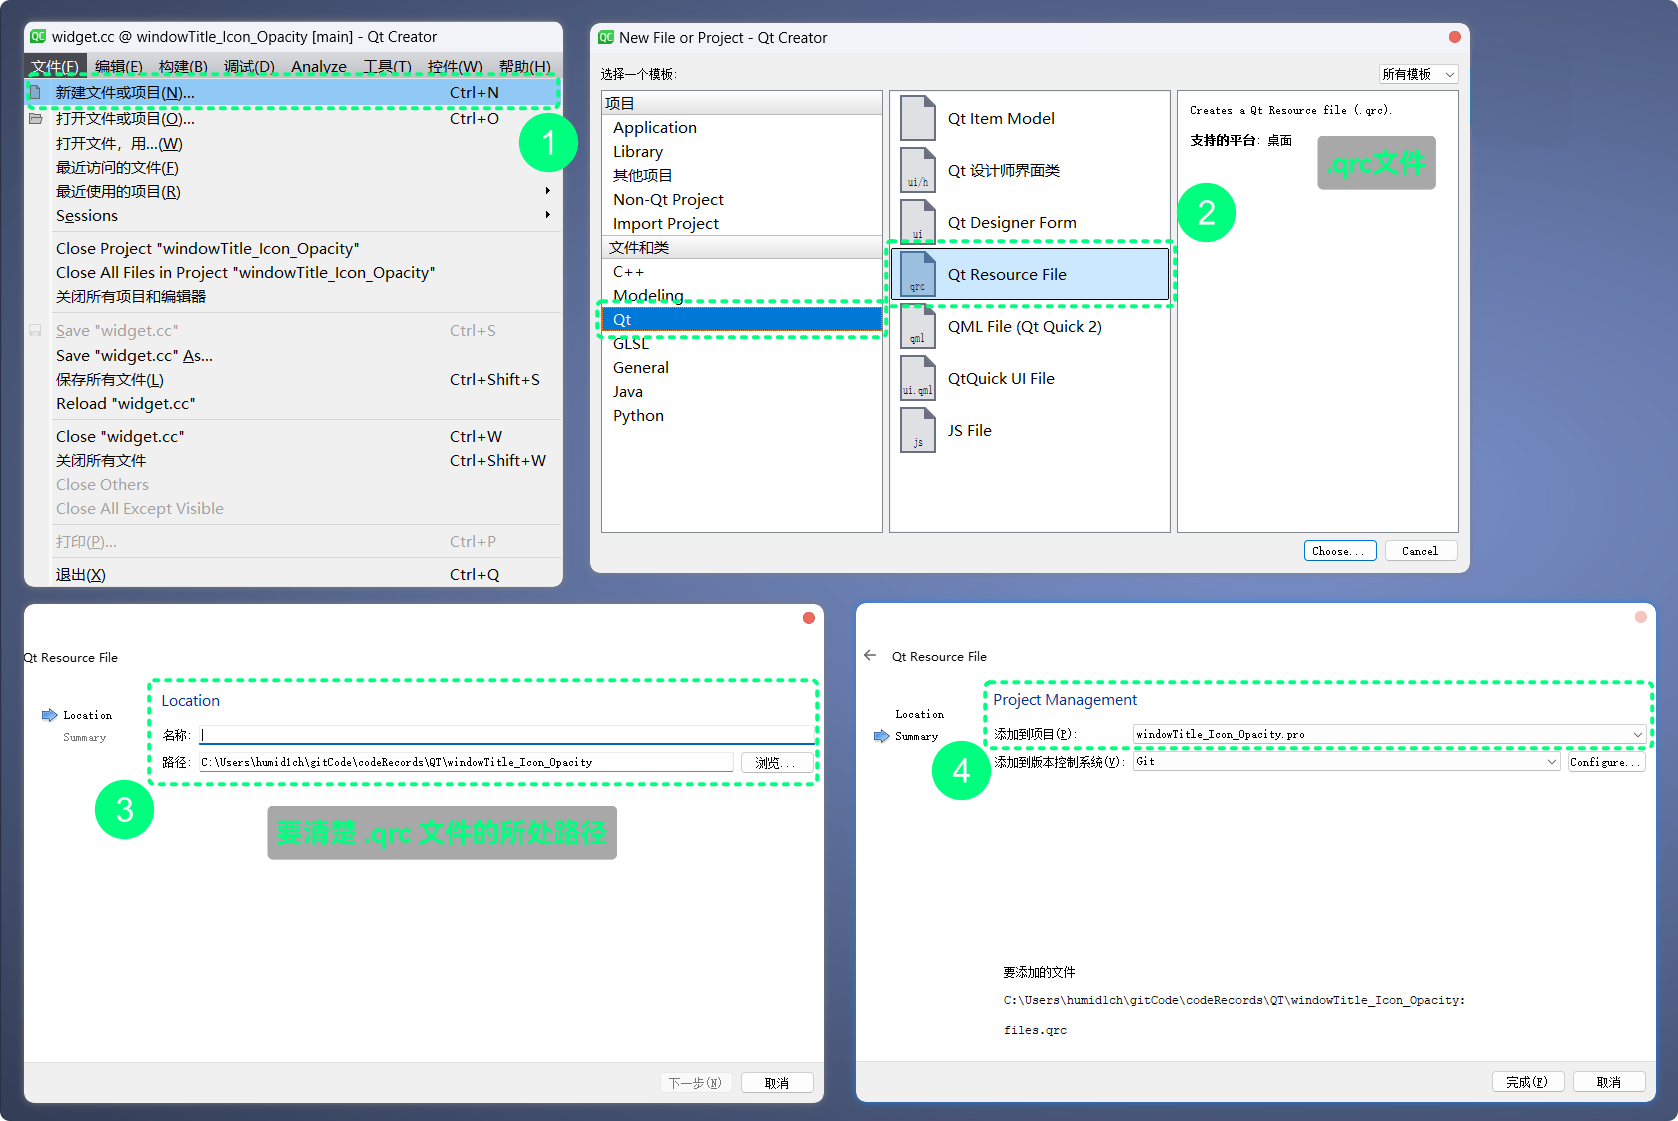
要清楚.qrc文件的所在路径, 因为需要被.qrc管理的文件, 要与.qrc文件处于同级目录或子目录下
创建好.qrc文件之后, 就可以通过QT Creator添加要管理的文件资源了:
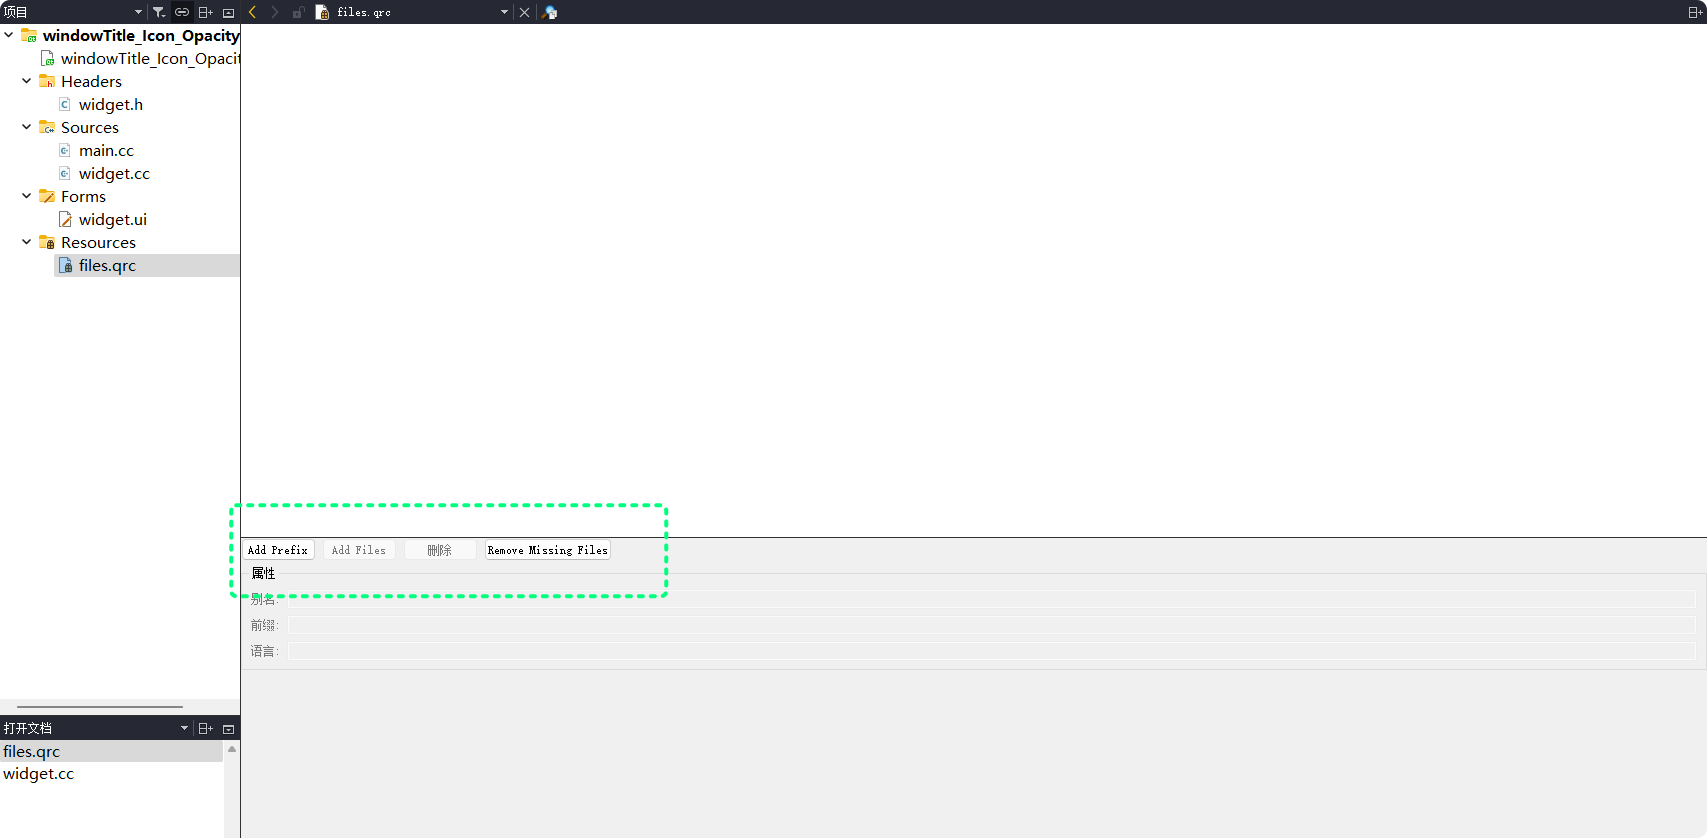
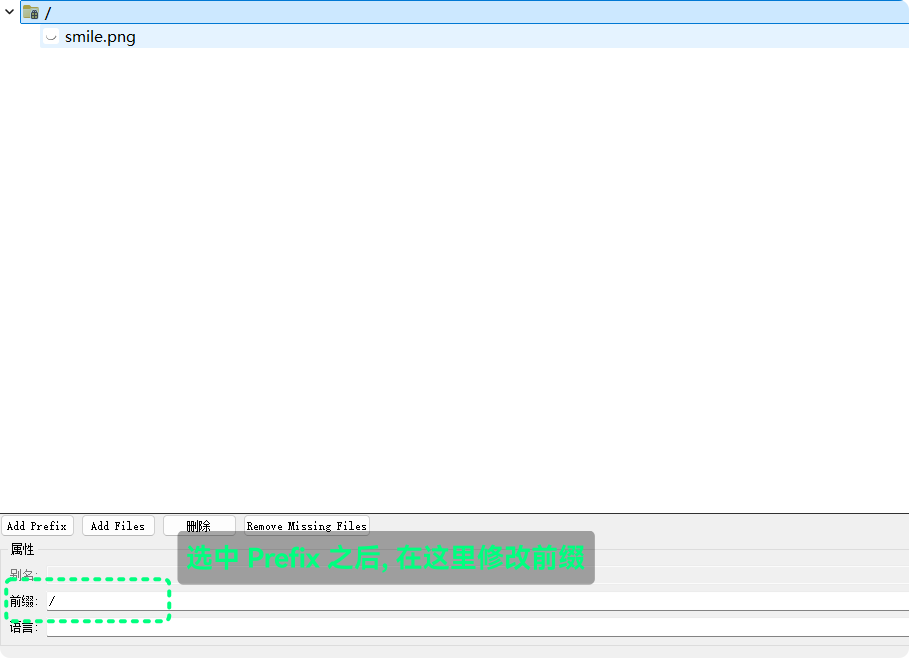
首先要添加Prefix, 即 前缀, 前缀是什么, 在代码中访问资源的路径就需要添加什么, 一般为/
然后可以在已添加的Prefix下添加文件, 点击Add Files添加文件资源, 且文件要处与.qrc同级目录或子目录下:
此时, .qrc文件内容为:
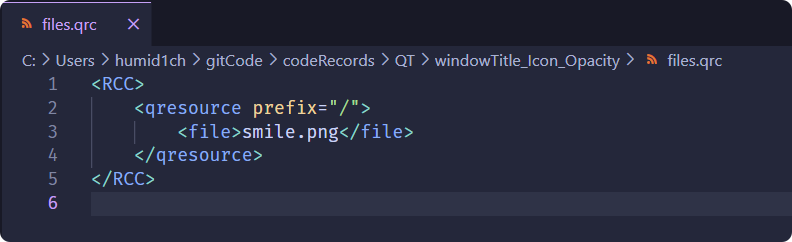
然后, 就可以在代码中使用:/smile.png访问到文件资源:
#include "widget.h"
#include "ui_widget.h"

#include <QDebug>

Widget::Widget(QWidget* parent)
    : QWidget(parent)
    , ui(new Ui::Widget) {
    ui->setupUi(this);

    QString title = this->windowTitle();
    qDebug() << title;

    this->setWindowTitle("这是一个窗口标题");
    title = this->windowTitle();
    qDebug() << title;

    // : 访问qrc管理的资源, / 就是前缀
    QIcon winIcon(":/smile.png");
    this->setWindowIcon(winIcon);
}

Widget::~Widget() {
    delete ui;
}
QT Creator实际是将被qrc管理的文件资源, 以二进制形式编译进了可执行程序中
在build-xxxxx的子目录下可以看到qrc相关的.cpp文件:

这个数组, 就是文件的二进制数据, 数组的每一个元素都是1字节unsigned char
此文件, 在QT Creator编译代码时 会一同编译进可执行程序中
qrc机制更适合于小文件资源, 如果太大, 不适合直接被加载到可执行程序中, 只会造成性能损耗
windowOpacity
此属性, 用于设置窗口的不透明度, 且此属性同样对独立窗口有效
QT提供了两个相关的接口:
| 接口 | 功能 |
|---|---|
qreal windowOpacity() const; | 获取窗口当前的不透明度 |
void setWindowOpacity(qreal level); | 设置窗口的不透明度 |
qreal实际就是double类型, 所以 使用也很简单:
widget.cc:
#include "widget.h"
#include "ui_widget.h"

#include <QDebug>

Widget::Widget(QWidget* parent)
    : QWidget(parent)
    , ui(new Ui::Widget) {
    ui->setupUi(this);

    QString title = this->windowTitle();
    qDebug() << title;

    this->setWindowTitle("这是一个窗口标题");
    title = this->windowTitle();
    qDebug() << title;

    QIcon winIcon(":/smile.png");
    this->setWindowIcon(winIcon);

    btn1 = new QPushButton(this);
    btn1->setGeometry(300, 210, 200, 40);
    btn1->setText("按钮1: +");
    connect(btn1, &QPushButton::clicked, this, &Widget::btn1ClickedHandler);

    btn2 = new QPushButton(this);
    btn2->setGeometry(300, 330, 200, 40);
    btn2->setText("按钮2: -");
    connect(btn2, &QPushButton::clicked, this, &Widget::btn2ClickedHandler);
}

Widget::~Widget() {
    delete ui;
}

void Widget::btn1ClickedHandler() {
    qreal winOpacity = this->windowOpacity();
    if (winOpacity > 1) {
        return;
    }

    this->setWindowOpacity(winOpacity + 0.05);

    qDebug() << this->windowOpacity();
}

void Widget::btn2ClickedHandler() {
    qreal winOpacity = this->windowOpacity();
    if (winOpacity < 0) {
        return;
    }

    this->setWindowOpacity(winOpacity - 0.05);

    qDebug() << this->windowOpacity();
}
这段代码的运行结果为:
从结果可以看到, windowOpacity这个属性, 是自带范围控制的[0, 1]
不建议把不透明度设置为
0, 窗口会变成无法选中状态
cursor
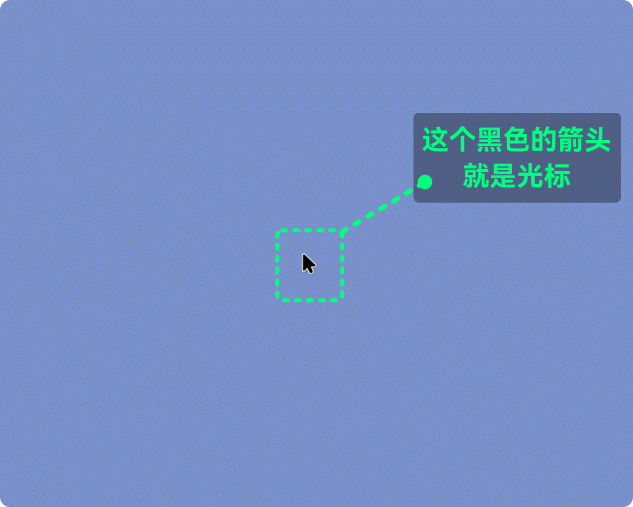
此属性, 用于设置控件范围内光标的样式
光标就是这个东西:
QT可以设置光标在控件范围时的光标形式, 可以在QT Designer中直接选择控件进行设置, 也可以通过代码的方式进行设置
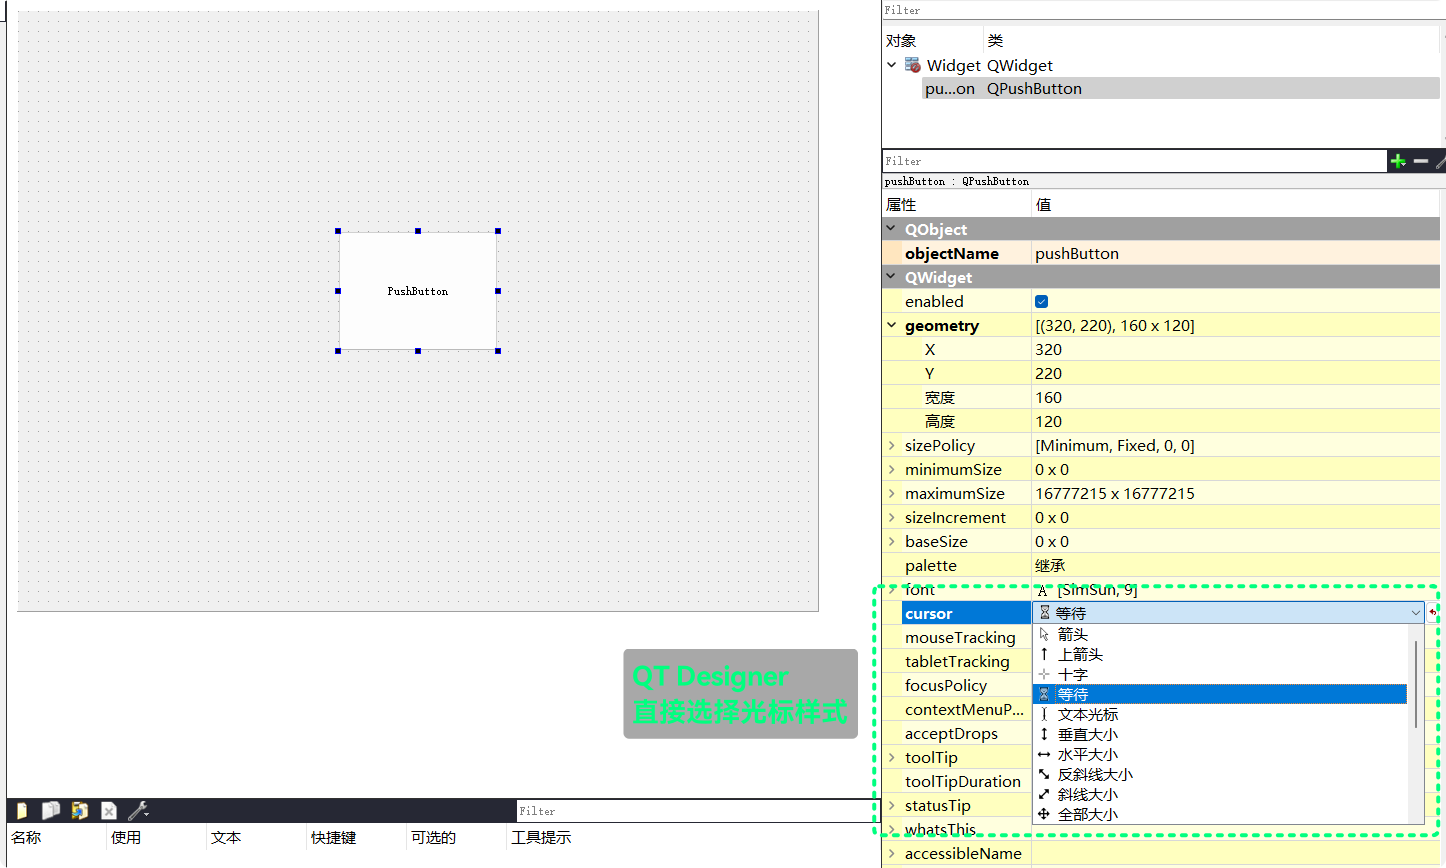
设置Widget的cursor为上箭头, pushButton的cursor为等待
设置完之后, 运行结果如下:
也可以通过代码进行设置, QT提供了相应的接口
| 接口 | 功能 |
|---|---|
QCursor cursor() const; | 获取控件当前光标样式 |
void setCursor(const QCursor &); | 设置控件的光标样式 |
void QGuiApplication::setOverrideCursor(const QCursor& cursor); | 设置全局光标样式, 对整个程序中所有的控件生效, 会覆盖setCursor()设置的样式 |
QCursor是一个光标类, 可以用来设置控件的cursor属性
widget.cc:
#include "widget.h"
#include "ui_widget.h"

#include <QPushButton>

Widget::Widget(QWidget* parent)
    : QWidget(parent)
    , ui(new Ui::Widget) {
    ui->setupUi(this);

    QCursor csr(Qt::CrossCursor);
    this->setCursor(csr);

    csr = Qt::IBeamCursor;
    ui->pushButton->setCursor(csr);
}

Widget::~Widget() {
    delete ui;
}
程序运行结果为:
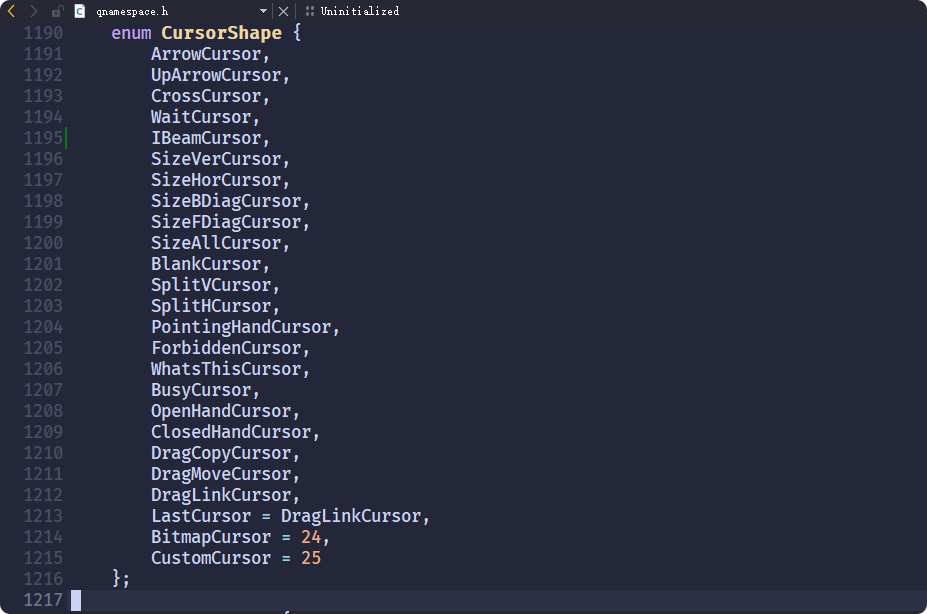
QT提供了许多的cursor类型, 都可以在QCursor对象中设置:
自定义光标样式
除了内置的光标样式之外, QT还能够自定义光标样式
可以使用图片, 作为控件的光标样式, 接口还是setCursor(), 参数也还是QCursor类型
但是, QCursor对象的实例化就不能是enum CursorShape了
需要使用图片资源实例化QCursor对象:
| 接口 | 功能 |
|---|---|
QCursor(const QPixmap &pixmap, int hotX=-1, int hotY=-1); | 以图片资源QPixmap实例化QCursor对象的构造函数 |
QPixmap类, 就是用于使用图片资源的类, 使用图片之前可以用qrc将图片资源管理起来

widget.cc:
#include "widget.h"
#include "ui_widget.h"

#include <QPushButton>

Widget::Widget(QWidget* parent)
    : QWidget(parent)
    , ui(new Ui::Widget) {
    ui->setupUi(this);

    QPixmap csrPic(":/heartWings.png");
    QCursor csr(csrPic);
    this->setCursor(csr);
    ui->pushButton->setCursor(csr);
}

Widget::~Widget() {
    delete ui;
}
程序运行的结果为:
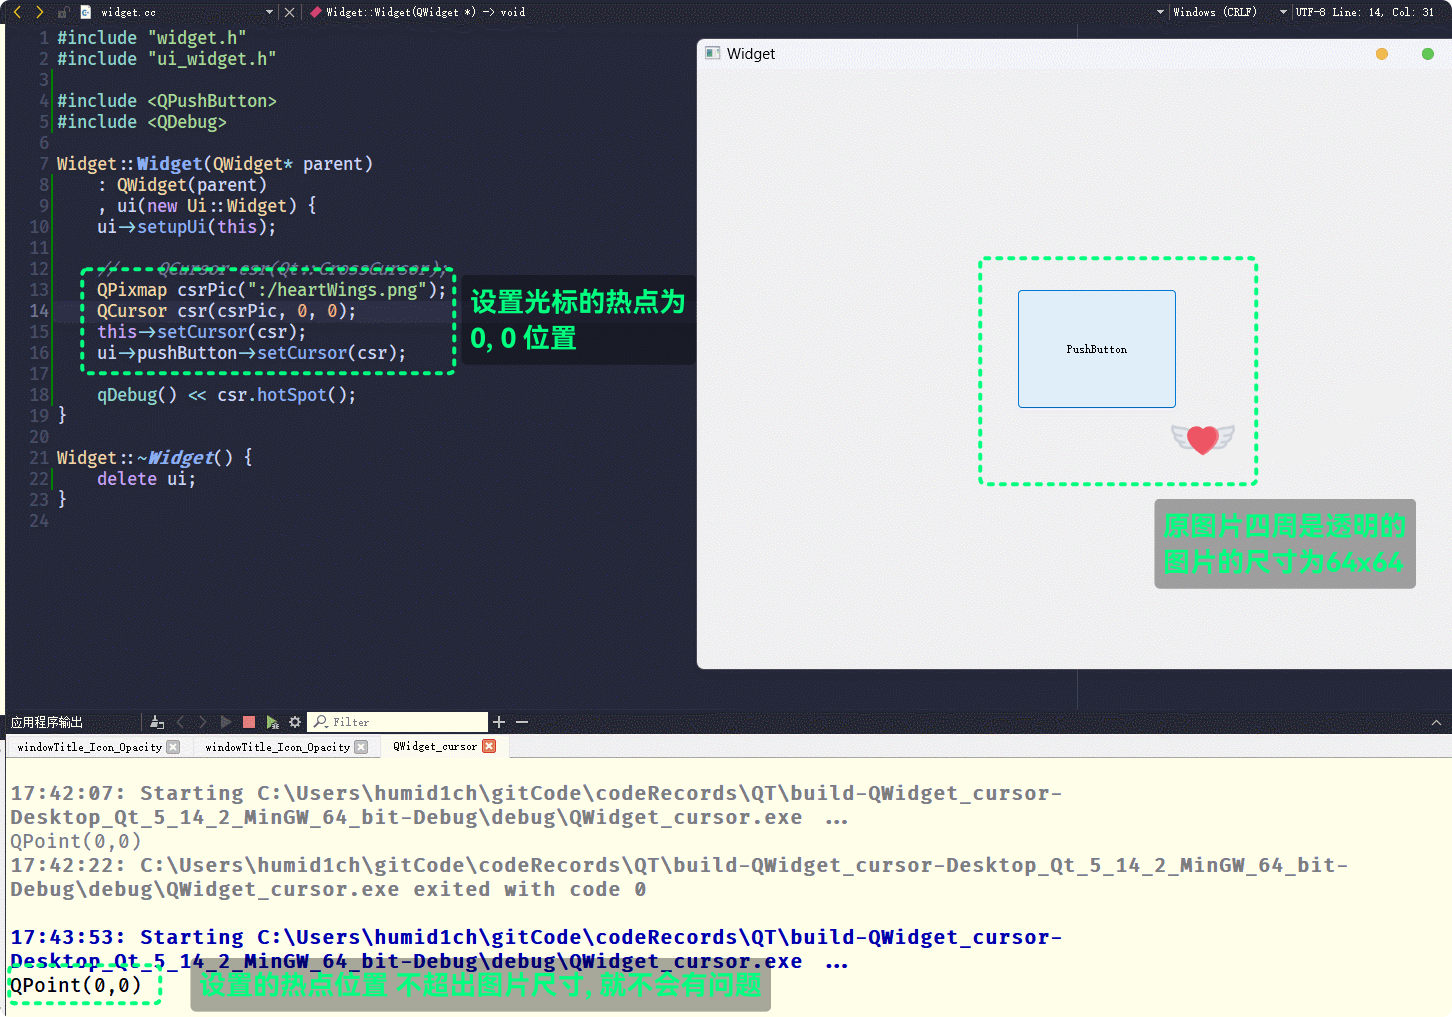
在使用图片自定义光标时, 如果没有特殊情况 默认的有效点击位置是图片的左上角(0, 0)的位置, 有效点击位置被叫做热点
什么是特殊情况呢, 如果图片的(0, 0)位置是透明的, 就是特殊情况
此时, 光标的热点就会默认被设置为图片的中心位置(上面例子中使用的图片就是64x64的四周透明的png图片)
通过QCursor::hotSpot()可以查看光标的热点:

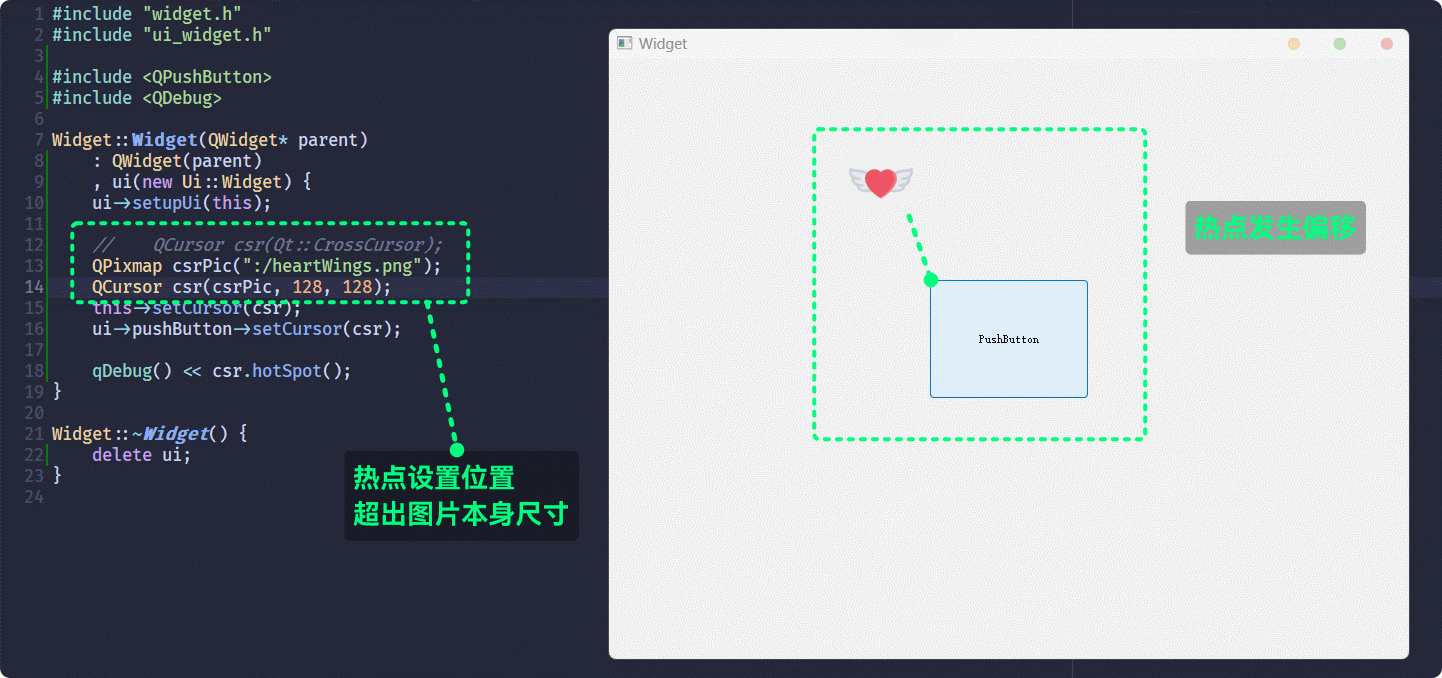
也可以在QCursor对象实例化时 构造函数传参设置光标的热点, 或通过成员函数setPos()设置光标的热点:
如果, 设置的热点位置超出了图片尺寸, 则光标热点会发生偏移:
font
此属性, 用于设置控件文本的字体样式
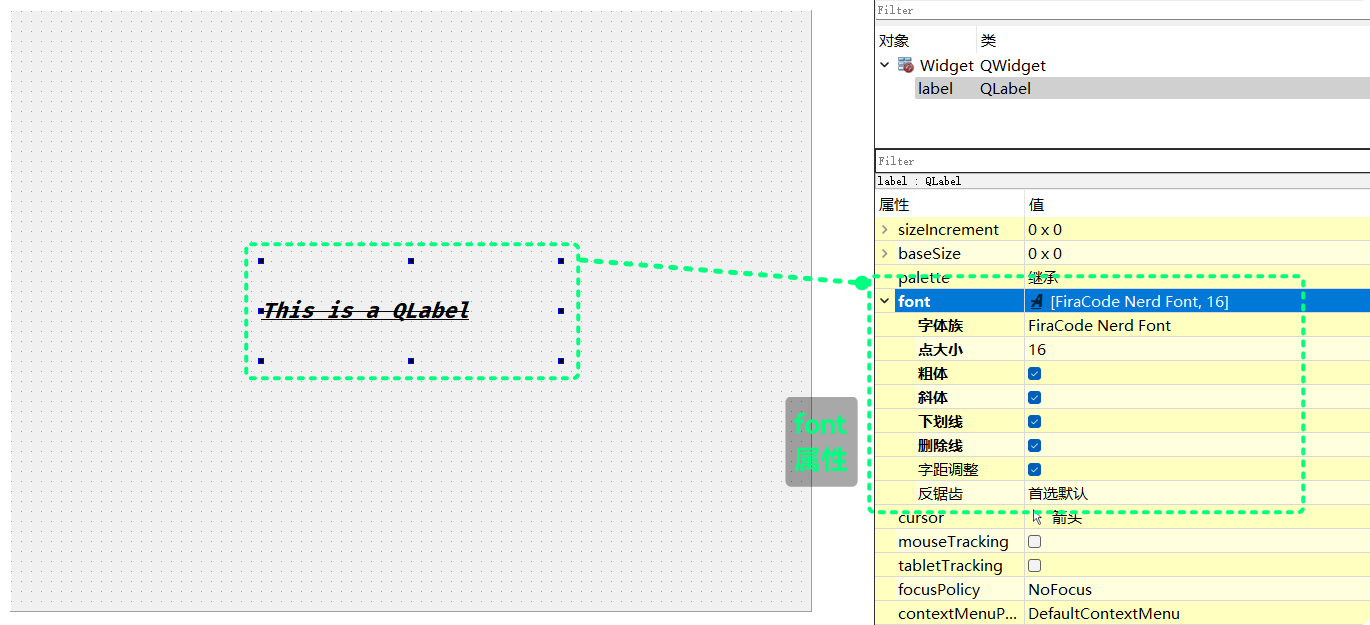
QT Designer可以直接设置控件的font属性, 并且在QT Designer中可以实时预览:
也可以通过代码的形式设置控件的font属性
QT的相关接口有:
| 接口 | 功能 |
|---|---|
const QFont &font() const; | 获取控件当前文本的font属性 |
void setFont(const QFont &); | 设置控件文本的font属性 |
这两个接口的用法很简单, 使用了QFont类
QFont类拥有一个字体的属性的成员, 通过设置QFont对象的成员, 再调用setFont()就能实现对控件文本的font属性的设置
QFont拥有许多的成员, 不过不用一一了解, 通常只需要了解一些常用的接口来设置font常用属性就可以了
font的常用属性已经在QT Designer中展示出来了:
字体族(font-family) 点大小(point-size) 粗体(bold) 斜体italic 下划线(underline) 删除线(strikeout) 字距调整(kerning)
点大小设置的就是字体大小
还有另外常用的: 字体风格(style) 字体宽度(weight)
这些都可以通过QFont的成员函数获取或设置, 下面只罗列设置:
| 接口 | 功能 |
|---|---|
void setFamily(const QString &); | 设置字体族, 即 什么字体, 通常需要保证系统中已安装 |
void setPointSize(int); | 设置字体大小 |
inline void setBold(bool); | 设置是否粗体 |
inline void setItalic(bool); | 设置是否斜体 |
void setUnderline(bool); | 设置是否有下划线 |
void setStrikeOut(bool); | 设置是否有删除线 |
void setKerning(bool); | 设置是否调整字体间距 |
void setStyle(Style style); | 设置字体风格, 与 字体粗细 倾斜等有关 |
void setWeight(int); | 设置字体宽度, 与 字体粗细有关 |
对QFont对象设置这些属性, 可以设置一个字体风格
若需要使用字体文件设置字体族, 则需要使用其他接口设置一个
QString表示字体族然后再调用
setFamily()设置字体族
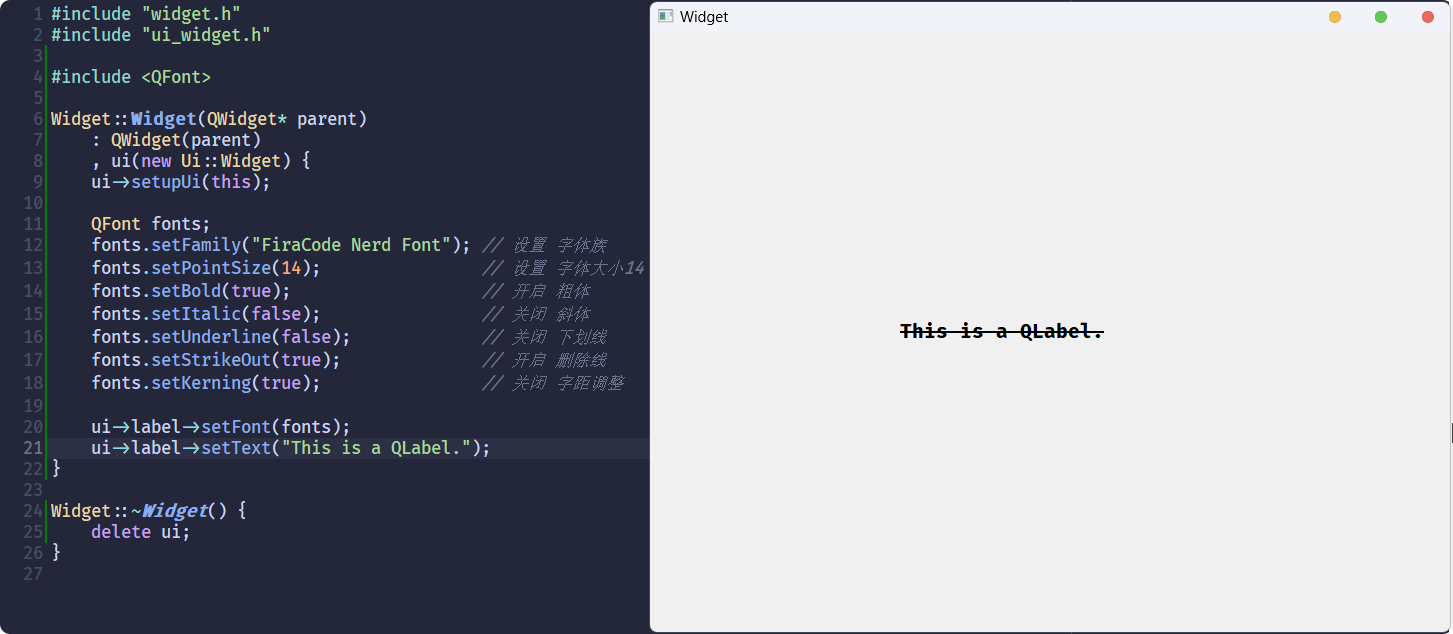
widget.cc:
#include "widget.h"
#include "ui_widget.h"

#include <QFont>

Widget::Widget(QWidget* parent)
    : QWidget(parent)
    , ui(new Ui::Widget) {
    ui->setupUi(this);

    QFont fonts;
    fonts.setFamily("FiraCode Nerd Font"); // 设置 字体族
    fonts.setPointSize(14);				   // 设置 字体大小14
    fonts.setBold(true);				   // 开启 粗体
    fonts.setItalic(false);				   // 关闭 斜体
    fonts.setUnderline(false);			   // 关闭 下划线
    fonts.setStrikeOut(true);			   // 开启 删除线
    fonts.setKerning(true);				   // 关闭 字距调整

    ui->label->setFont(fonts);
    ui->label->setText("This is a QLabel.");
}

Widget::~Widget() {
    delete ui;
}
程序的执行结果为:
tooltip
此属性, 用于设置光标悬停在控件上时, 给出的提示
什么意思呢, 举个例子:
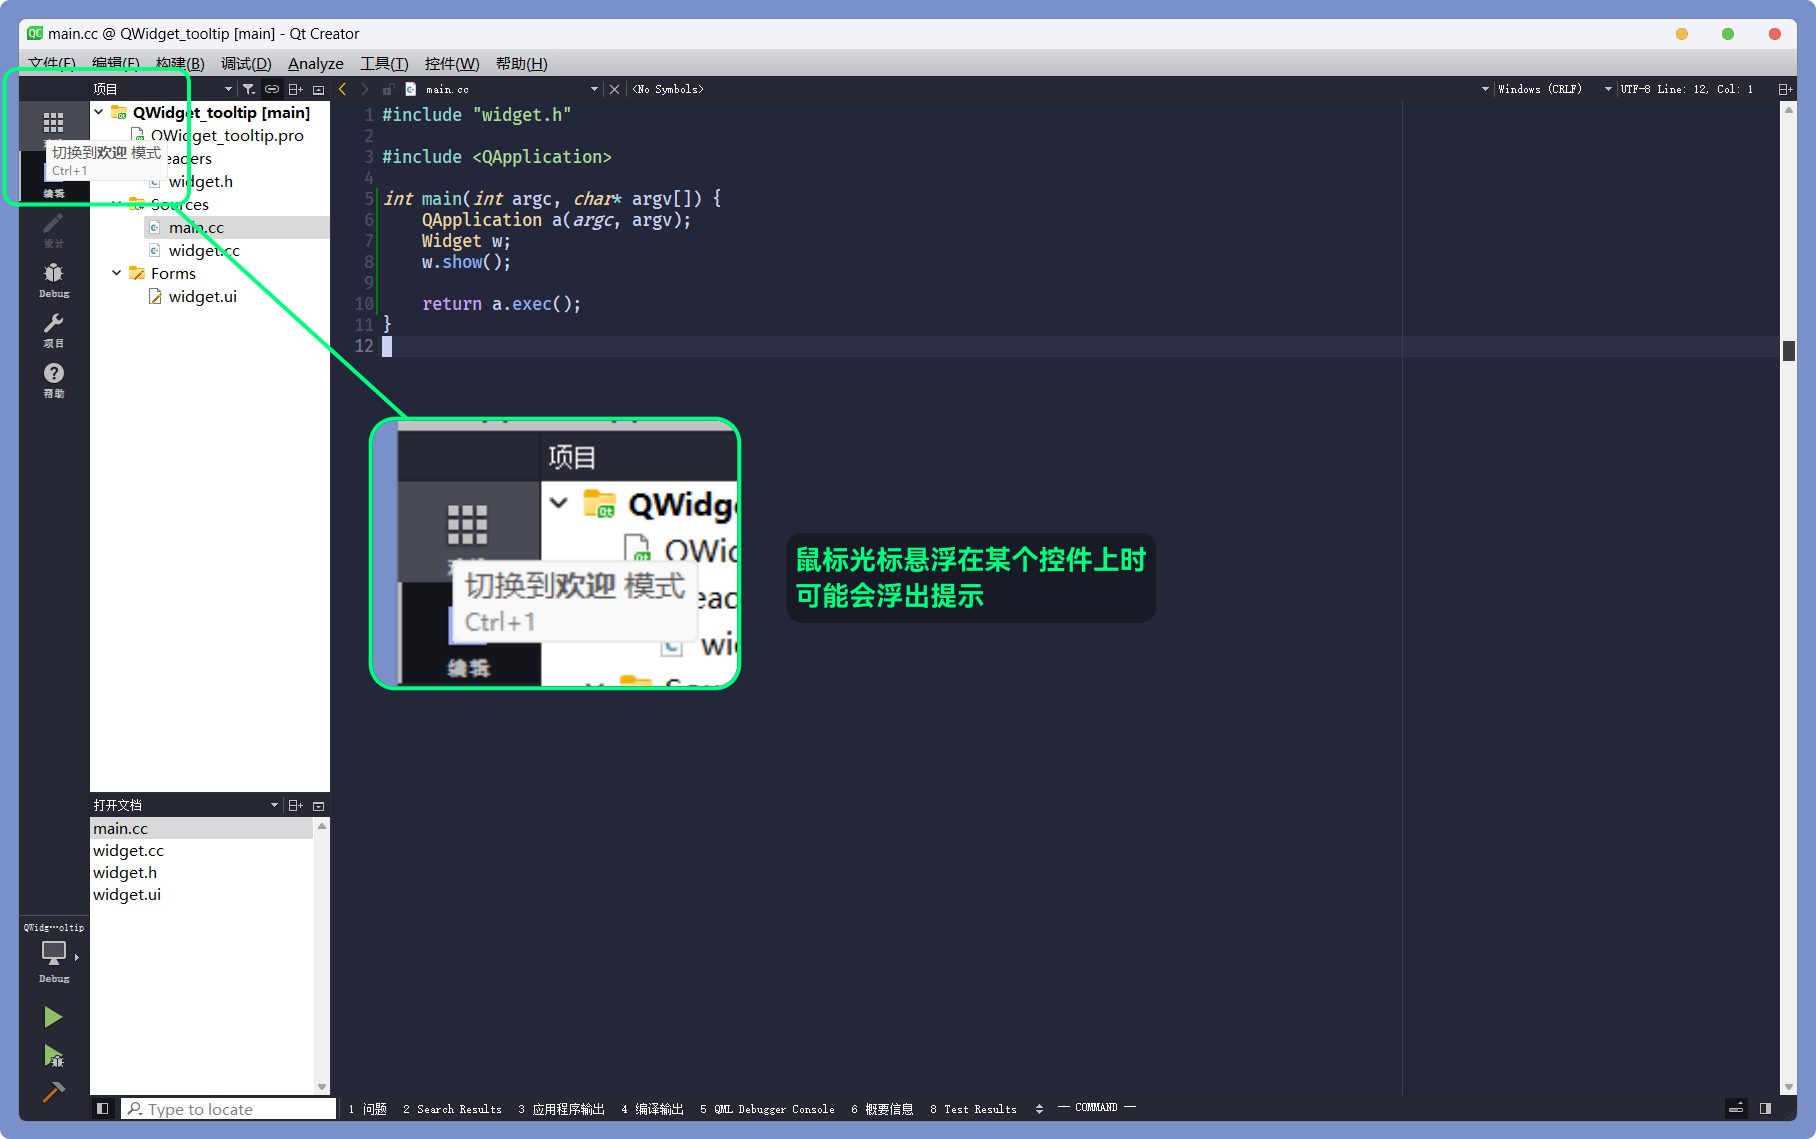
这样的提示就是tooltip可以显示的内容
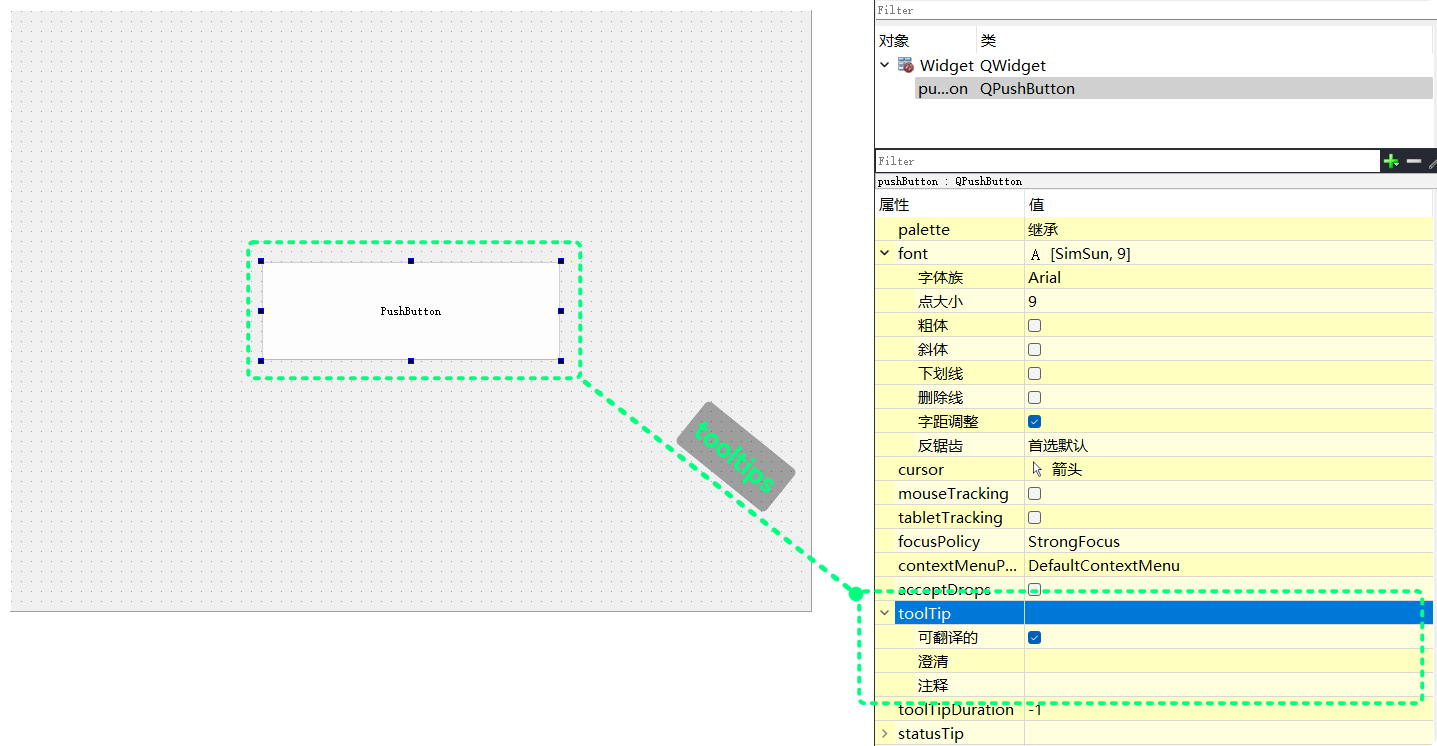
QT Designer中有相关的设置:
也可以直接通过代码设置, QT相关的接口有:
| 接口 | 功能 |
|---|---|
QString toolTip() const; | 获取控件当前的tooltip |
void setToolTip(const QString &); | 设置控件的tooltip |
int toolTipDuration() const; | 获取控件当前tooltip的持续显示时间, 单位ms |
void setToolTipDuration(int msec); | 设置控件tooltip的持续显示时间, 单位ms |
对PushButton设置tooltip: “这只是一个什么用都没有的按钮”, 持续显示时间为5000ms
widget.cc:
#include "widget.h"
#include "ui_widget.h"

Widget::Widget(QWidget* parent)
    : QWidget(parent)
    , ui(new Ui::Widget) {
    ui->setupUi(this);

    ui->pushButton->setToolTip("这只是一个什么用都没有的按钮");
    ui->pushButton->setToolTipDuration(5000);
}

Widget::~Widget() {
    delete ui;
}
程序运行结果为:
focusPolicy
此属性, 用于设置控件的聚焦方式
要理解聚焦方式, 首先要理解聚焦, 什么是聚焦?
在上网的过程中, 一定遇到过各种登录的场景, 比如:
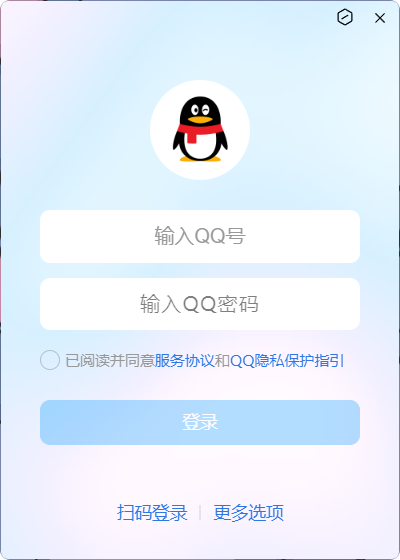
在需要从键盘输入数据时, 需要先点击单行文本编辑框, 将输入焦点聚焦在单行文本编辑框上
然后才能将文本输入到聚焦的单行文本编辑框中:

并且, 可以通过点击或Tab的方式, 切换所聚焦的单行文本编辑框:

而focusPolicy就是设置这些控件的聚焦方式
Qt::FocusPolicy是一枚举类型:
enum FocusPolicy {
    NoFocus = 0, 								// 不接收键盘焦点, 即 无法聚焦
    TabFocus = 0x1,								// 可以且只能通过Tab键获取焦点
    ClickFocus = 0x2,							// 可以且只能通过点击获取焦点
    StrongFocus = TabFocus | ClickFocus | 0x8,	// 可以同时通过Tab或点击获取焦点
    WheelFocus = StrongFocus | 0x4 				// 还可以通过滚轮滚动获取焦点
};在QT Designer创建5个单行文本编辑框, 并分别设置为:
NoFocus TabFocus TabFocus ClickFocus StrongFocus
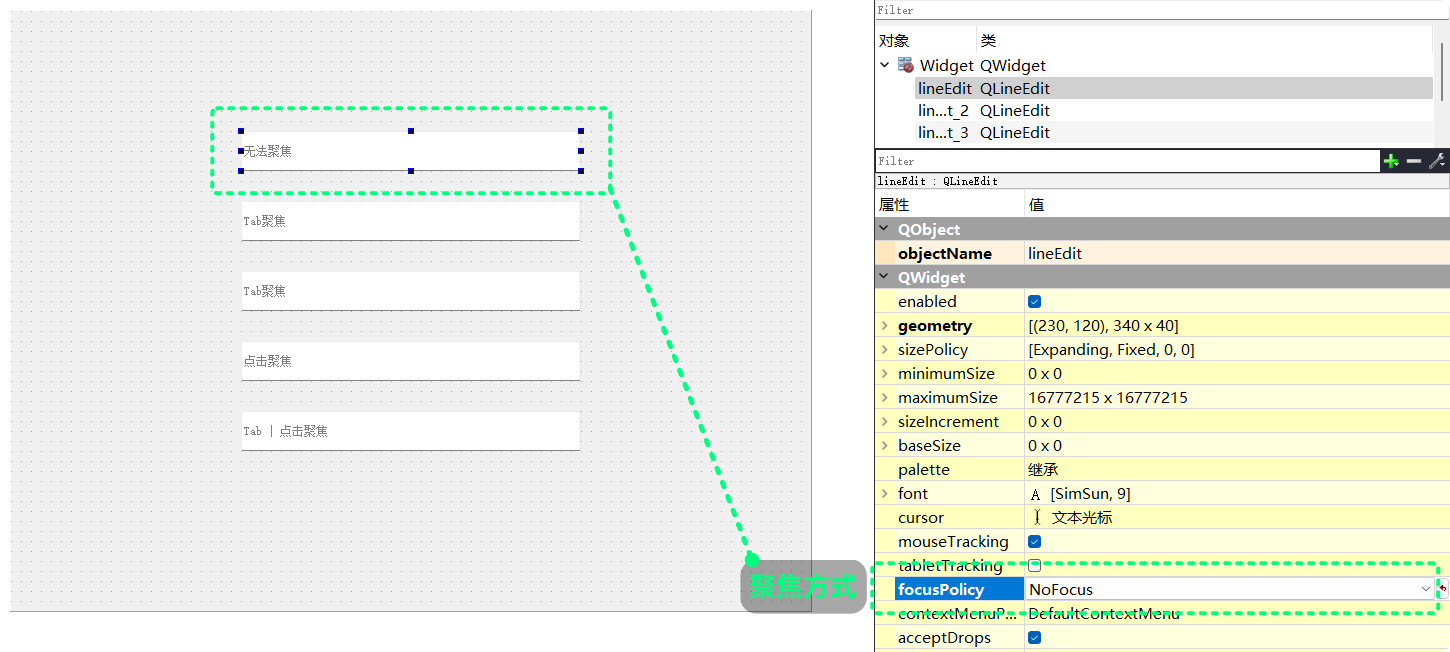
执行结果为:
代码实现QT相关的接口有:
| 接口 | 功能 |
|---|---|
Qt::FocusPolicy focusPolicy() const; | 获取控件当前聚焦方式 |
void setFocusPolicy(Qt::FocusPolicy policy); | 设置控件的聚焦方式 |
用代码的方式, 实现与上面相同的效果:
可以在
QT Designer修改各lineEidt的objectName为:
lineEdit_noFocuslineEdit_tabFocus_1lineEdit_tabFocus_2lineEdit_clickFocuslineEdit_strongFocus
#include "widget.h"
#include "ui_widget.h"

#include <QDebug>

Widget::Widget(QWidget* parent)
    : QWidget(parent)
    , ui(new Ui::Widget) {
    ui->setupUi(this);

    ui->lineEdit_noFocus->setFocusPolicy(Qt::NoFocus);
    qDebug() << ui->lineEdit_noFocus->focusPolicy();

    ui->lineEdit_tabFocus_1->setFocusPolicy(Qt::TabFocus);
    qDebug() << ui->lineEdit_tabFocus_1->focusPolicy();

    ui->lineEdit_tabFocus_2->setFocusPolicy(Qt::TabFocus);
    qDebug() << ui->lineEdit_tabFocus_2->focusPolicy();

    ui->lineEdit_clickFocus->setFocusPolicy(Qt::ClickFocus);
    qDebug() << ui->lineEdit_clickFocus->focusPolicy();

    ui->lineEdit_strongFocus->setFocusPolicy(Qt::StrongFocus);
    qDebug() << ui->lineEdit_strongFocus->focusPolicy();
}

Widget::~Widget() {
    delete ui;
}
运行结果为:
styleSheet
此属性, 用于设置控件的QSS样式
QSS样式是QT中一种类似CSS的东西
CSS在网页前端的开发中是必备的, 它一般长这样:
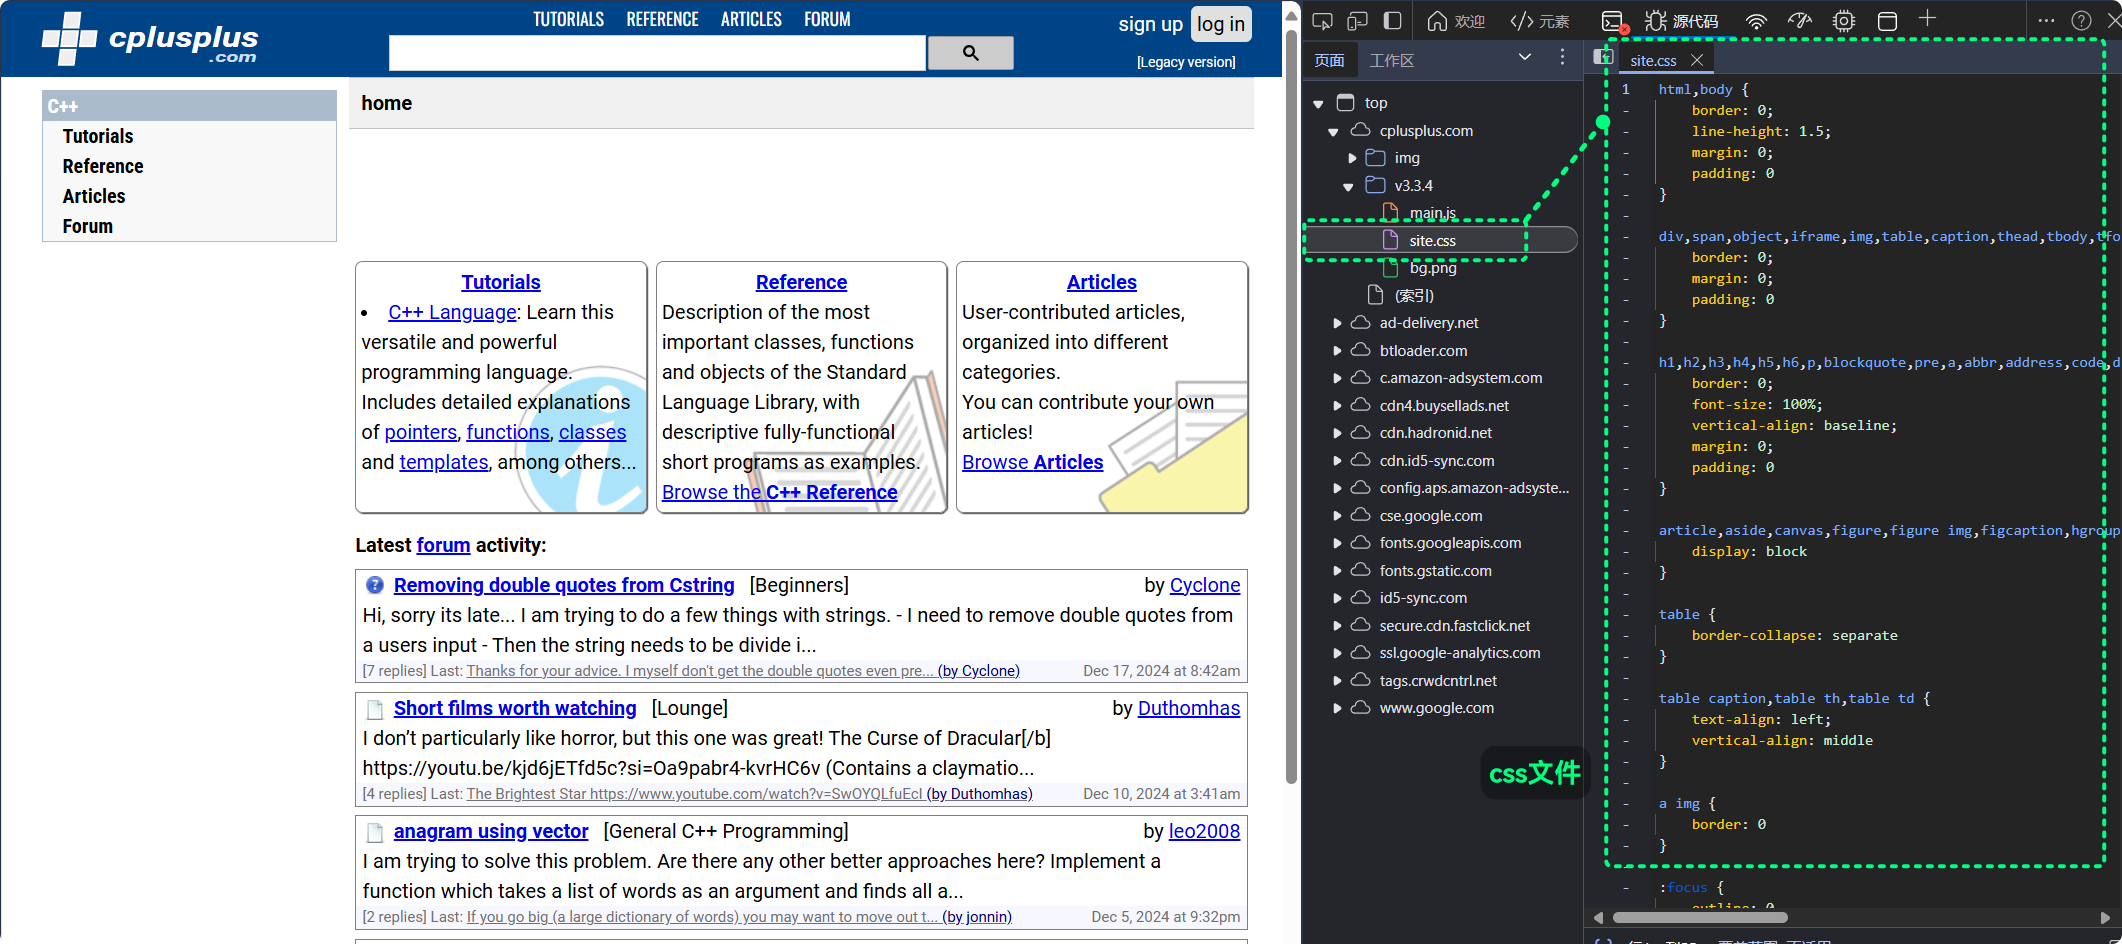
由标签和其所拥有的若干的键值对组成, 设置网页元素的风格, 用于网页元素的渲染
QSS的语法与CSS高度相似, 不过在更复杂场景又存在不同
QSS也可以通过标签+键值对的方式, 设置控件的风格, 具体语法不多介绍
只需要知道QT可以通过类似CSS的QSS设置控件的风格了
在QT Designer中, 可以直接对控件进行QSS风格设置:
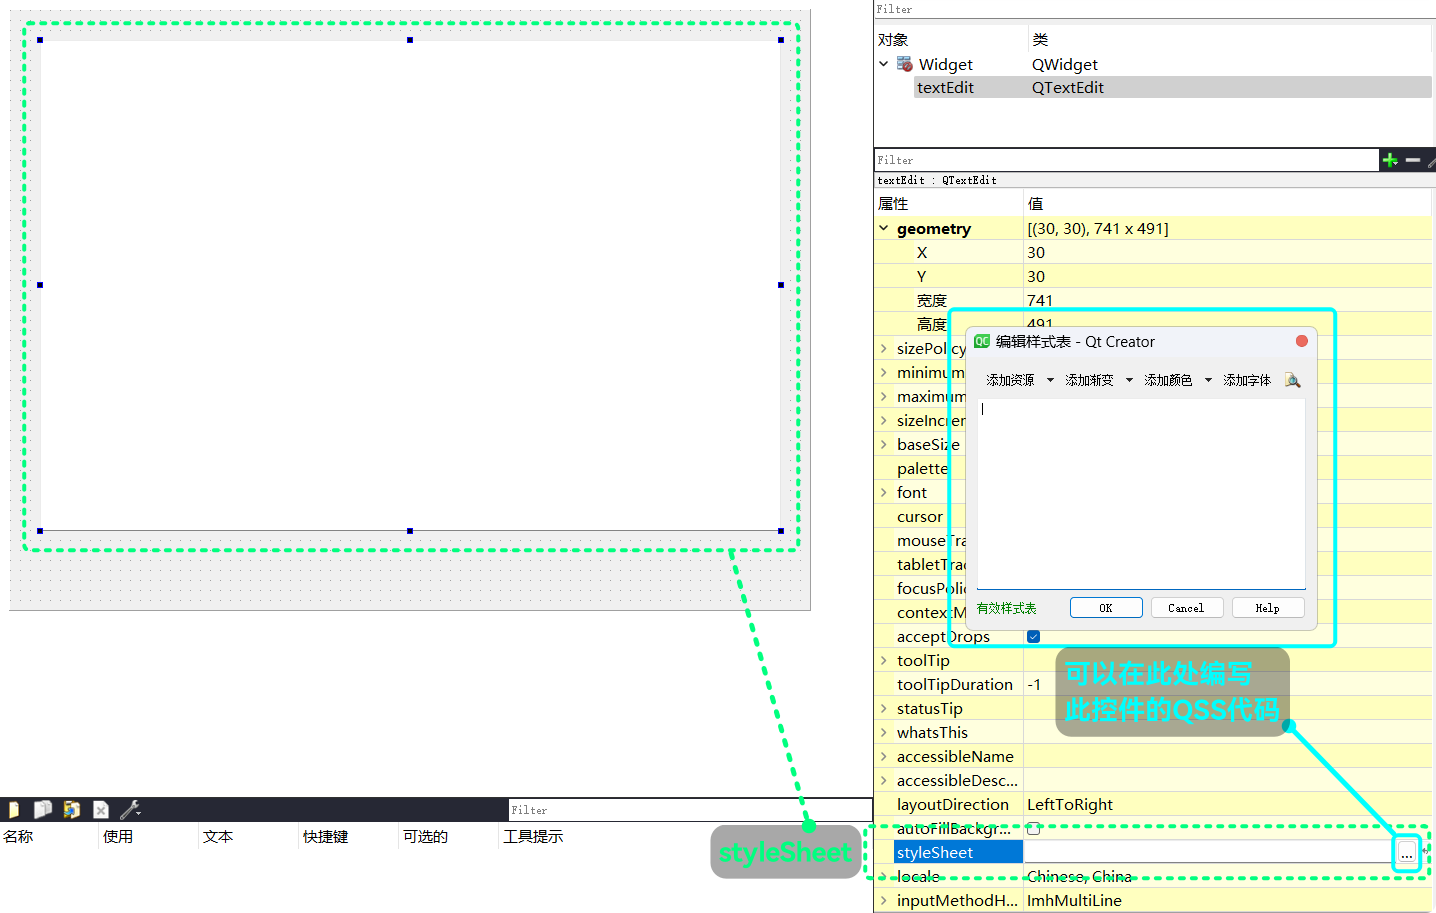
比如:
background-color: rgb(255, 255, 127);
color: rgb(255, 0, 0);
font-family: "FiraCode Nerd Font";
font-weight: 800;
font-size: 16pt;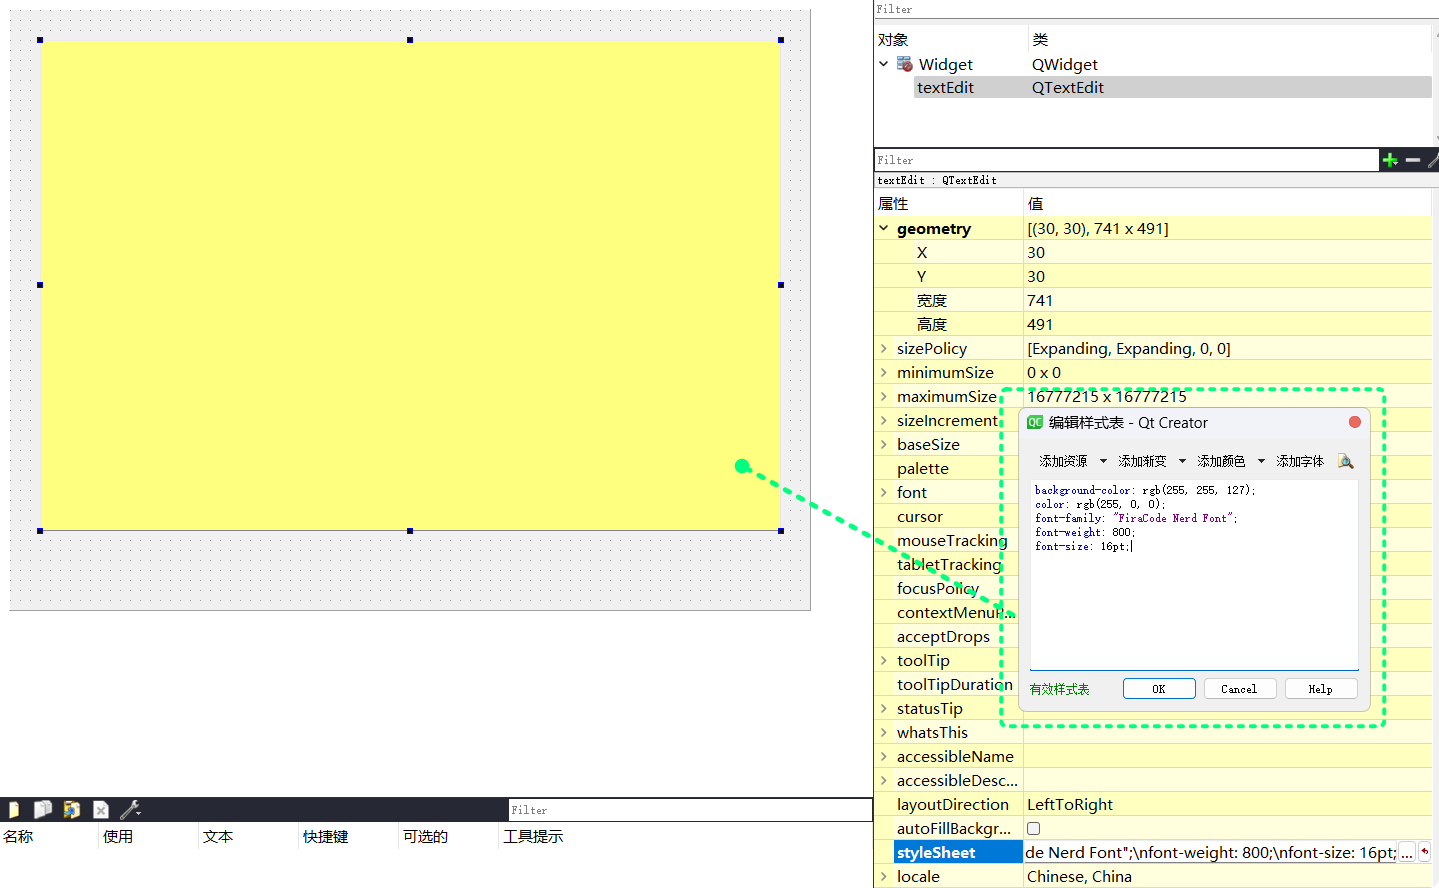
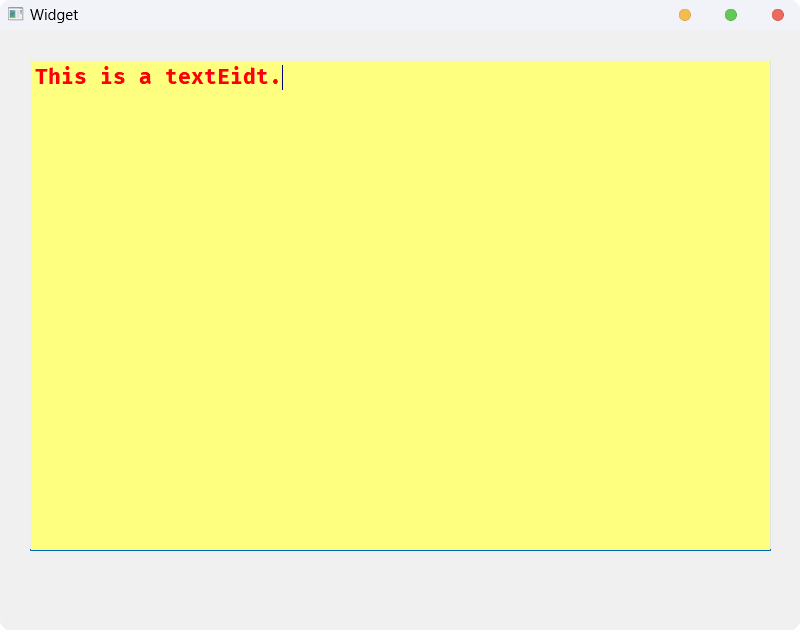
运行, 并输入文本:
如果要通过代码实现, QT相关的接口有:
| 接口 | 功能 |
|---|---|
QString styleSheet() const | 获取控件当前的styleSheet |
void setStyleSheet(const QString& styleSheet); | 设置控件的styleSheet |
获取和设置都以QString作为对象
用代码的方式实现上面的效果:
widget.cc:
#include "widget.h"
#include "ui_widget.h"

#include <QDebug>

Widget::Widget(QWidget* parent)
    : QWidget(parent)
    , ui(new Ui::Widget) {
    ui->setupUi(this);

    qDebug() << ui->textEdit->styleSheet();
    ui->textEdit->setStyleSheet("background-color: rgb(255, 255, 127); color: rgb(255, 0, 0); font-family: 'FiraCode Nerd Font'; font-weight: 800; font-size: 16pt;");
    qDebug() << ui->textEdit->styleSheet();
}

Widget::~Widget() {
    delete ui;
}通过setStyleSheet()设置控件的QSS格式, 只需要以QString的形式将键值对传入其中就可以了
运行结果为:
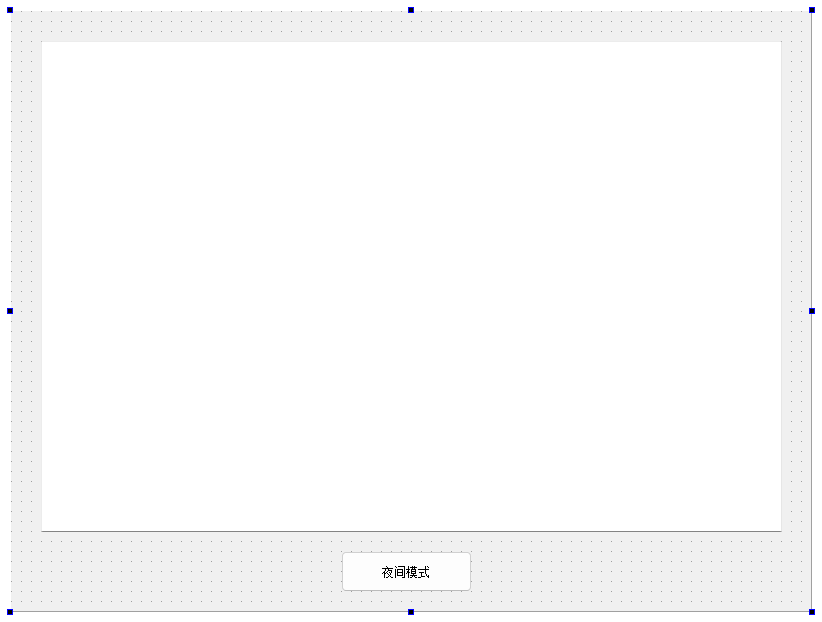
日间与夜间模式(小玩具程序)
QT Designer:
widget.h:
#ifndef WIDGET_H
#define WIDGET_H

#include <QWidget>

QT_BEGIN_NAMESPACE
namespace Ui {
    class Widget;
}
QT_END_NAMESPACE

class Widget : public QWidget {
    Q_OBJECT

public:
    Widget(QWidget* parent = nullptr);
    ~Widget();

private slots:
    void on_pushButton_clicked();

private:
    Ui::Widget* ui;
    bool isNight;
};
#endif // WIDGET_Hwidget.cc:
#include "widget.h"
#include "ui_widget.h"

#include <QDebug>

Widget::Widget(QWidget* parent)
    : QWidget(parent)
    , ui(new Ui::Widget)
    , isNight(false) {
    ui->setupUi(this);

    ui->textEdit->setStyleSheet("font-family: 'FiraCode Nerd Font'; font-size: 16pt;");
}

Widget::~Widget() {
    delete ui;
}

void Widget::on_pushButton_clicked() {
    if (isNight) {
        // 当前为夜间模式, 需要设置为日间模式
        this->setStyleSheet("background-color: rgb(240, 240, 240); color: black;");
        ui->textEdit->setStyleSheet("background-color: white; color: black; font-family: 'FiraCode Nerd "
                                    "Font'; font-size: 16pt;");
        ui->pushButton->setText("夜间模式");

        isNight = false;
    }
    else {
        // 当前为日间模式, 需要设置为夜间模式
        this->setStyleSheet("background-color: rgb(36, 39, 58); color: rgb(202, 211, 245);");
        ui->textEdit->setStyleSheet("background-color: rgb(36, 39, 58); color: rgb(202, 211, 245); font-family: 'FiraCode Nerd "
                                    "Font'; font-size: 16pt;");
        ui->pushButton->setText("日间模式");

        isNight = true;
    }
}
运行结果:
上面就是QWidget最常用的一些属性, QT中所有的控件基本都是从QWidget继承出来的
所以, 相关控件都拥有QWidget的一些属性, 在后续其他控件的介绍中, 就可以直接使用
要了解更多, 可以查看QT文档
感谢阅读~